Friday, August 30, 2013

FAQ, Part 11

Are red jackets appropriate attire for the jumper ring?

The answer depends on what colour the national team jacket is in your country. If the team wears red, it's a faux-pas to wear the same colour that those team members have worked so hard to earn. The same applies for non-red team jacket colours in other countries as well, though some countries use common jacket colours that are distinguished by coloured collars or patches.

Brightly-coloured show jackets are becoming more and more popular in the jumper ring, making colours like red more widely available than they used to be. As a result, you will occasionally see a rider wearing the same colour as the national team, but while it is not against the rules in every country, it is still frowned upon by most. Check the rules of your national federation before you go out shopping, and do your best to avoid the same colour combination as your national team (both jacket and collar) even if it isn't explicitly written in the rule book.

How can I keep the cheeks on my hackamore bridle from going into my horse's eyes?

This is a common problem with hackamores, exacerbated by the curb action that can swing a seemingly well-fitted bridle towards the eyes.

If your hackamore is adjustable, you can try making it wider so that the cheek pieces attach further away from the bridge of the nose, bringing them slightly away from the eyes as well.

If your hackamore is a fixed size, the trick is to tie the cheek pieces away from the eyes by adding a string or strap to the bridle. Simply tie a piece of conservatively-coloured string (number string works well, or anything else like a shoe lace that isn't likely to rub) from about halfway up one cheekpiece, under the jaw and up around to the other cheekpiece. Make it tight enough to keep the cheekpieces out of the eyes, but not so tight that it will rub or restrict the horse in any way. A leather strap of an appropriate length could also be used to the same purpose (spur straps, a shortened bradoon hanger, etc.).

If you do a Google image search for Russel Skelton Royal Fair, a couple of examples will pop up showing what the set-up should look like.

Why aren't hunter score sheets made public?

Quite simply, most people would not understand them if they were. Unlike dressage with its single score sheet per horse and myriad comments, a hunter class is scored with only one line of symbols and notes per horse, necessitating the use of symbols that each judge finds fastest and easiest to use, and which can vary from judge to judge. Because hunter judges don't have scribes, this system allows the judge to keep as much focus on the horse as possible with minimal writing and no delays between rounds for writing comments, as well as the ability to compare rounds quickly without flipping pages.

Any comments are usually more for the judge to remember the round for comparing scoring than to comment on every aspect of it, while the more obvious symbols such as the shape of each jump should have been felt and seen by the rider and coach, anyway.

Which type of hair net is the correct choice for the hunter ring?

There are three categories of hair net marketed for riding: traditional two-knot hair nets, one-knot hair nets, and no-knot hair nets. The two-knot hair nets can be uncomfortable because of the multiple knots, but this also keeps them tighter and less baggy than the more comfortable one-knot type (no pressure points if the knot is put in the back but the hair net can puff outwards if not tucked in). No-knot hair nets are like bands, open at the top of the head.

Because only the edge of the hair net will ever show under your helmet anyway, there is no one correct choice. Choose the option that is most comfortable for you while still allowing you to keep your hair neatly contained.

What should I do if the zipper on my boot breaks?

If your federation's rules allow you to compete in your schooling paddock boots and half chaps, you can switch to those if you are able to clean and polish them to show ring standards.

If you don't have a back-up set of boots with you, you can use electrical or duct tape (preferably black) wrapped around the boot to keep it closed. Zippers tend to break at the worst possible times, so black tape is a good thing to have in your tack box just in case. Try to have the zipper repaired as soon as you can, but everyone is likely to be understanding of inconspicuous tape in the meantime because it has happened to so many.

Wednesday, August 21, 2013

Tried, It's True! #2

This is the second instalment of "Tried, It's True!", a series about situations that have actually been witnessed at horse shows that are very dangerous, bad ideas. These mistakes come from people who mean well but have had horse show stress take over their brains or have simply never thought about the potential consequences. These posts aim to warn others who might make the same mistakes.

A couple of weeks ago, I came across some photos on Facebook that someone had posted from a recent horse show. In several of them, her horse could be seen tied to the trailer with the chain over its nose!

A horse should never, under any circumstances, be tied with the chain over the nose (or under the chin, for the matter). The further down the nose you go, the more sensitive the facial structures become. A chain that slips down (it can slip down with the noseband even if it's wrapped around) can easily reach the more sensitive structures and cause a lot of damage should the horse pull back on the chain. Even higher up on the nose, the full weight of the horse against the chain would likely have very bad results.

I am not against using a lead chain over the nose for leading; I use one on my own horse at shows just in case the atmosphere gets a bit too exciting. One downside to the chain is that when you need to apply pressure, it can tighten against the nose and not release on its own. When there is a human at the other end of the chain, this pressure can quickly be released by hand and the maximum weight that the horse can pull back against is that of the human, approximately 10-20% of the horse's own weight. There is a risk that the horse could get loose and step on the lead, but that is a small risk that can be weighed against the benefits of the extra insurance that the chain provides.

When you tie with the chain, however, the force when pulling back can be up to 100% of the horse's weight, a big difference to those sensitive parts of the face! There is also no one to release pressure when the chain tightens, meaning that the horse can be punished for extended periods simply for standing still.

If your horse does not tie well, the answer is not to tie it to the trailer! Such a horse probably shouldn't be tied at all without a wall behind it, especially not to an object that could possibly be tipped or dragged. A chain would likely just make the horse panic more in addition to damaging the nose if the horse were to pull back. On a fairly cool day, you could keep the horse tied on the trailer (always with a bar or wall behind), or in warmer weather rent a day stall or simply hold the horse for a few hours.

Some things are just not worth risking your horse's well-being for, and tying your horse to anything with the lead chain over the nose is one of those things. Some people might get away with it some of the time, but when it goes wrong, it will go very wrong.

Have you witnessed a dangerous situation related to showing that you would like others to be warned against doing? You can leave a comment on the blog, tell me on Facebook or send me an e-mail at showringreadyblog@gmail.com.

Wednesday, August 7, 2013

Studs 101

Disclaimer:  If you have never used screw-in studs (aka caulks, aka corks) before, and even if you have, they should be employed under the guidance of your farrier and/or trainer. Adding studs to your horse's shoes will change the way that the feet move across the ground, making it very important not to over-stud, and it's possible to damage a shoe or your horse's foot by putting them in improperly. For these reasons, I strongly recommend that you use this post only as a reference while getting hands-on help from a horse person who you trust.

Your stud kit

Some tack shops sell ready-made stud kits, which can be convenient but could make it difficult for you to grow your stud collection or store additional tools. It isn't difficult to assemble your own kit.

A stud kit
For your stud kit, you will first need a box in which to store everything. It's best to keep everything together so that you don't end up missing a vital component when you're away from home. Plastic tackle boxes work extremely well for stud kits; they come in a variety of sizes, often with removable dividers that will allow you to keep the studs grouped appropriately.
A stud hole cleaner

Next, you will need a stud hole cleaner. Some riders prefer to just use a horse shoe nail to clean the holes, but I appreciate having the wire brush as well to make the holes even cleaner. They are very inexpensive and are available at most tack shops.

A T-tap (left) and a hardware store
tap (right) with homemade handle
You will also need a tap. They come in a variety of shapes, from the traditional t-tap to the more modern safety taps. You can even purchase taps from hardware stores, in which case you'll need to bring along a stud or tack store tap to check for the correct size with the store's thread checker. I have found that these taps are much sharper/more effective, but for that reason might not be ideal for someone starting out who might cross-thread more often. You'll also need to purchase or create a handle for a hardware store tap (which allows just the tap section to be replaced when it wears out).

Next on the list is at least one wrench. Adjustable wrenches work well if you have studs of different widths, or you can just keep a plain wrench on hand of each size that you need so that there's no need to fiddle. Do not use vise grips as these will strip the edges from your studs and eventually give you nothing to grab onto to get them out of the shoes!

Another item that you should keep on hand is some sort of oil or specially-formulated stud soap to keep the studs in good shape. I just use WD-40.

Your horse will need to be shod, preferably in steel as opposed to softer aluminum shoes that will not maintain their threads as well. You will need to ask your farrier to drill holes for the studs in the shoes before they're put on your horse's feet (there is usually an extra charge for this).

Last but not least, you'll need the studs themselves, available from most tack shops. You'll want to start with enough of each type/size that you think you might need for either two or all four shoes, as well as a couple of extras for when those get lost (with studs, it's always a "when" and not an "if").

There are some extra items that you can purchase, such as a magnetic stud dish or arm band to lessen the chances of dropping/losing a stud, but the basics that I listed above should get you by easily.

Choosing studs

Studs can be roughly divided into four categories, depending on their shape and size, although there is a lot of overlap between categories. Most horses will not need a wide variety of studs as the larger ones are typically used for extreme footing/terrain or horses that really need that extra grip for the bigger jumps. Your coach or farrier should be able to suggest the best types for your horse and the particular footing that you expect to contend with.

Usually the studs on the front shoes will be smaller than on the back to minimize injury, both to the horse's stomach and to the legs (a belly pad girth will help to protect the stomach from front studs). The hind end requires the most traction anyway and there is less potential for injury when using bigger studs there, though a horse can still puncture itself by stepping on one hind foot with the other. You can use different studs of similar height on the same foot if you want to have something sharper on the outside, but it's necessary to try to keep the forces on the foot as even as possible when doing so.

Road studs

These are only a few millimetres high and give just a small amount of traction. Because they are small, they don't change the horse's way of going very much and are less likely than other types to cause injury. They are often used for the front shoes when nothing bigger is required.

Grass tips
Grass tips are narrow, pointy studs that can bite into fairly hard ground. Because they are so sharp, they are risky to use on the inside branch of the horse shoe where the horse might accidentally step on itself.

Bullets
Bullets are a good general-purpose stud because they are fairly pointy, enabling them to grab into the footing, while having enough surface area that they can provide some traction in deep or wet footing. They also come in many different heights to suit a variety of purposes.


Blocks
Blocks are fairly blunt, square-ish studs intended to provide a lot of surface area for the horse to push against in soft or muddy footing. They're less likely to draw blood if a horse missteps than the sharper options but they don't have the same ability to sink into and grab more solid footing. They may or may not have a small tip.

Inserting studs

The first thing you'll need to do is clean the holes. If possible, have the horse on clean, hard ground so that you won't lose all of your hard work if the horse pulls its foot away from you. Otherwise, you'll need to go through every step one foot at a time without putting the foot down in order to keep the holes clean.

With the nail end of your stud hole cleaner, loosen up the dirt in each stud hole, flinging as much out of the hole as you can. Once that's done, turn the tool around and twist the wire brush into the hole. Give it a turn or two at the bottom and then twist it out again. If there is any large debris left in the hole (a small piece of gravel, etc.), keep cleaning until you get it out.

Next, you'll need to use your tap. If you use studs frequently it might not be necessary to tap every time, but you aren't likely to be able to avoid it otherwise. The tap will clean up the threads of the stud hole, which can get damaged by dirt and other debris, while also clearing out any dirt that the wire brush missed. Insert the tap so that it is in line with the hole, never at an angle, and gently allow the threads to catch. Don't force it or you risk cross-threading and potentially ruining the hole. Turn the tap just until you encounter resistance; go any further and you risk hurting your horse's hoof.

It's extremely important not to allow the horse to put its foot down while the tap is screwed in (even safety taps could potentially bend slightly in such a case). Not only could the tap get jammed up into the hoof, but it could also damage the stud hole enough to get itself stuck or to make it difficult to screw a stud in later. As soon as you feel resistance, unscrew the tap without delay.

At this point, the hole should be ready for a stud. You can clean the holes ahead of time and plug them to make inserting the studs easier later (for example, to allow the horse to trailer without studs or to keep your show clothes clean), or you can immediately insert the studs.

To insert a stud, simply align your chosen stud with the hole and gently screw it in at least one turn by hand. This will keep the stud from falling out of the hole while you fasten the wrench. Attach the wrench and tighten the stud until it's snug (if your hole and stud are clean, there should not be a gap left between the shoe and the base of the stud). If you don't tighten enough, the stud could work its way loose during your ride and come off, while over-tightening can make it difficult to get the studs out again without torquing your horse's foot.

To remove a stud, simply reverse the process: use the wrench to loosen the stud until you can do the final turns by hand to avoid the stud flying off. You will need to clean the studs before the dirt hardens (the wire brush on your stud hole cleaner works well for this, as well as the nail for scraping the corners) and then oil them to keep them from rusting. Some people prefer to use a product such as Stud Suds to immerse their studs in a cleaning/lubricating solution, but I like to just put my clean studs back into their section of the box and give them a spray of WD-40. Close the lid, shake the box gently, and you'll end up with evenly-coated studs without you having to handle them while they're really oily. You can fit a small piece of paper towel to the bottom of each section of studs to absorb any excess oil.

It's important to remove the studs promptly when they're no longer needed to keep the stress on the horse's tendons to a minimum (studs on hard ground change the hoof angle in addition to changing how the hoof moves across the ground), as well as to prevent injuries from the horse stepping on itself.

If you wish to use plugs, there are several options available:

There are screw-in metal blanks that can be inserted and removed with an Allen key, the most expensive option initially and a risk if you lose your Allen key or if they get stuck from a lack of grease.

Foam, rubber and cotton plugs are all disposable and each has its pros and cons. There doesn't seem to be a consensus on which works best so you'll need to judge for yourself. I use the foam ones as I find that they keep the holes clean and are fairly easy to remove in one piece. Whichever you use, try to remove them from the edge rather than from the middle to prevent ripping them apart or pushing them deeper (a nail works well to lever them out).

If you use disposable plugs, keep in mind that they can fall out or get pushed deeper into the hole over time, so they work best overnight or for just a couple of days.

When to replace studs

A road stud in good shape (left)
compared to one that is worn out (right)
Studs last a very long time; most of the studs that are pictured here are almost ten years old and many riders have studs in their boxes that have been around for far longer. If you take care of them and don't use them daily or on hard, abrasive ground, they should last you a long time.

If your studs have a sharp tip, that's the part that is most likely to wear out first. Alternately, using improper tools, like vise grips, can ruin the edges of your studs and make them difficult to grab onto with a wrench, requiring the studs to be replaced. The threads are usually well-protected by the shoe and aren't likely to wear out very quickly unless they're allowed to rust. A quick visual examination after each use should be enough to tell you what sort of shape your studs are in because there isn't much else to watch out for.


Friday, July 26, 2013

How to Open/Close Your Account

Many hunter/jumper shows do not require pre-payment of entries, which means that upon arrival, an account must be opened to pay the show fees. Certain shows, such as those that can only take limited entries and/or which require qualification, might require entries to be paid in full in advance and for any additional fees during the week (hay, shavings, etc.) to be paid either immediately or put on an open account. The prize list or show secretary should be able to advise you of each show's procedure.

The first step to open an account is to go to the show office and ask them to find your paperwork, which is usually under the barn or trainer name. You will need to provide any additional documents that are required (passport, Coggins test, etc.) and then provide payment. Form of payment will vary from show to show but paying by cheque is probably the most common, followed by cash or credit card (not every show is equipped to accept payment by credit card).

Leaving an open cheque (filled out with everything but the amount) will allow you to make class changes and order hay/shavings throughout the week while guaranteeing the office that you will pay. Your cheque will be filed away until you close the account. Some shows may allow you to leave a cheque written out for the exact amount of show fees based on your initial entries, which you can then exchange for a different cheque at the end of the show if the amount changes or write out an additional cheque for the difference.

Entries that the show has had trouble collecting payment from in the past (bounced cheques, etc.) might be designated as "cash customers" and will have to pay in cash as they go.

If a show accepts payment by credit card, the card number can be left in the office, similar to an open cheque. 

The form of payment can usually be changed when the account is closed, so if one form is easier to leave available at the beginning of the show but you actually want to pay with a different method, it shouldn't be a problem.

In most cases, only once you have left your payment and submitted all documentation will you receive your number. The office might allow for a single "barn" cheque to release the numbers of every horse for a given trainer if the trainer is willing to allow that cheque to cover the entries of any clients who do not close their accounts themselves. If you have multiple horses, you should be able to use one cheque to pay for them all if you so desire.

An account can stay open for the duration of a horse show and then must be closed. Whether the show lasts a day or a week, the account must be closed by the last day of the show or earlier. Even if there are subsequent shows taking place at the same location, each individual show must be paid for separately (if the show names are different or if each week is numbered, the shows are separate and not just one long horse show).

To close an account, you'll need to hand your number in (or simply recite the number if the show doesn't want them returned). The secretary will print out a bill and you can review it before paying because mistakes are occasionally made. Trainer splits should be taken care of early in the week because the office is often too busy to handle changes to them on the weekend (and changes at that point may affect those who have already paid), but mistakes on the office's part can be rectified because they are not your fault. Once you are satisfied that your bill is correct, you can pay (you will need to ask for your cheque back if you left one) and your bill should be stamped as proof of payment.

Prize money can be accorded either by removing it directly from the bill or by sending a cheque through the mail at a later date. In the former case, you may be given a cheque in the office if your prize money won is greater than your entry fees, or simply have reduced entry fees if the prize money is less. If cheques will be mailed out, you will need to pay your entry fees in full when your account is closed.

If you do not go to the office to close your account, you forfeit the right to dispute the charges on your show bill and your cheque will be filled out or your credit card charged by the show office. The office might charge an additional fee to those who do not close their accounts, and any entry that cannot be paid in full might be reported to the national federation to be placed in bad standing, which can affect the competitor's ability to attend other shows.

Do not forget to collect any documents that you left with the office such as passports; they are often left in a box for pick-up rather than handed back to you by the secretary. Anything left behind can either be brought along to the next show on the circuit or kept with the show venue or secretary, so trying to get documents back after leaving them behind isn't always easy.


Tuesday, June 25, 2013

How to Find a Braider

If you aren't yet experienced enough to create a set of flawless hunter braids, or if you would like to avoid the stress of braiding on the show day, you might be considering hiring a professional braider.

At multi-day shows, professional braiders are seen braiding through the night and morning (they can be recognized by their braiding belts overflowing with cut yarn, their ever-present foldable step stools and their looks of exhaustion by the end of the morning). They are available to braid horses who are stabled on-site, and occasionally those who ship in early enough and have a suitable workspace for them. For single-day shows, professionals can be someone within your barn or someone who is willing to travel from barn to barn in the area to braid.

Braiders often start taking bookings before the show season begins, and some can book up early unless they hire other braiders to handle their overflow. For this reason it's important to find a braider as early as you can; you can't guarantee that the best ones will have spots available for you at the last minute.

There are several ways in which you could find a professional braider prior to (or at) a horse show. The best, in my opinion, is through word of mouth. Anyone can call themself a professional braider; there is no guarantee of quality. If you ask others who they use and are happy with, you have a better chance of finding someone who will do a good job. Here are the main ways to find a braider, in order of my personal preference:

Word of mouth

Simply put, ask others which braiders they prefer to use. If you don't know anyone to ask, most grooms and riders are quite happy to recommend good braiders so don't hesitate to ask someone you're stabled beside, in line with you at the show office, etc. This method will also catch those braiders who are so popular that they don't always need to advertise. You might also be able to see a braider at work in the morning and inquire about their availability later in the week or for a future show if you like the quality of their work.

Advertisement at a show

Some braiders will put up signs at the show office, on bulletin boards or on walls in high traffic areas. These signs often include sample photos of braids and convenient tabs that you can rip off with the braider's contact information. While none of this is any guarantee of quality, a physical advertisement shows that the braider actually visits the show venues and isn't someone just hoping to get enough clients to be able to make it out to the show.

Advertisement online

Braiders will sometimes advertise on social media, either in groups for geographical horsey areas/show circuits, or on pages devoted to the individual horse shows. While you can ask for sample photos, there is a risk when they're viewed privately that the photos are not that braider's work. Also, anyone can post an ad hoping to get clients, which makes it a favourite option for those just starting out who might not have yet perfected their craft.

You can also post a "wanted" ad online, but you again have no surefire way of vetting those who respond.

Once you've found a braider, you'll need to contact them and ask whether they are available for your horse show. The braider must be told which days your horse needs to be braided for, as well as which division you'll be showing in (in order to schedule which horses need to be done first). You will also need to give the horse's location (so that they will not be forced to wander around the showgrounds searching for your stalls) and name (which you should clearly mark on the stall so that the correct horse will be braided!). Be sure to also let the braider know if the horse's mane is in need of pulling or shortening so that can be worked into their schedule.

If there is anything that the braider will need from you, such as a fake tail, tail wrap or neck cover, leave it in a clean, accessible place and tell the braider about it; they're not mind-readers!

Anything that happens to your horse once braided is not the braider's responsibility. While some styles of braiding might be more itchy than others, a braid rubber is usually a braid rubber and the braider can't be expected to go around looking for and fixing rubbed-out braids throughout the day. Also, the removal of the braids is your job, so keep a seam ripper on hand (cutting through the yarn strands crossed underneath a braid will often be enough to unravel the whole thing).

Most braiders will come around in the morning following their braiding to collect money so that cash isn't being left out during the night to potentially be stolen. While it's possible to miss the braider for a day or two if you're away from your stalls, try to pay as promptly as you can. Braiders work hard and the last thing that they need to be doing after hour upon hour of braiding is chasing people around the showgrounds. If you have trustworthy people who will usually be present at your stalls, find a safe place to put the cash there and ask them to give it to the braider if she comes around while you're at the show ring.

Thursday, June 13, 2013

What To Wear: Men's Edition

My previous posts about show ring attire have been very much focused on the female rider, so this post will aim to focus more on the men's side. There are many similarities, therefore I won't necessarily go too in-depth about every common detail because those can be read in the general hunter and jumper rider editions.

Hunters/Equitation

The Equine Canada rule for dress is as follows:

ARTICLE G109 DRESS
1. All competitors must be properly dressed in the confines of the arena. This includes the inspection of the course and at the presentation of prizes.
2. Competitors should be neatly and suitably dressed in coat, shirt and tie, choker or stock, breeches or jodhpurs and boots. Black or brown smooth leather half chaps are permissible providing they match the boot colour.
... Only approved helmets (see Article G102) of a conservative color are allowed.
3. If competitors are not suitably dressed, the judge may refuse to allow them to compete.
4. In hunter competitions, in extremely hot weather, coats are optional at the discretion of the Competition Committee.
...
6. At all EC-sanctioned competitions, anyone mounted on a horse must wear the required headgear (see Article G102.1) as well as safe, appropriate footwear.

The key for hunters is to dress conservatively and neatly.

Helmet 

The helmets for men are the same as those for women.

Hair 

Men are lucky that they don't have to worry about doing "hunter hair". Try to keep your hair cut short enough that it doesn't hang too far out of your helmet and that's about it!

Show shirt 

Show shirts for men are the same as regular dress shirts, although a select few companies do market show shirts to men with special features for riding. Ideally, opt for a shirt with long sleeves as the lack of a cuff on short-sleeved shirts can give you an unfinished look. You can choose whatever colour you want for your shirt but make sure that it doesn't clash with your jacket. The most common colours are white and pastels. When you want a formal look, go with a white shirt.

You will need to wear a tie, and for a regular hunter class, the colour of tie is up to you. Conservative is again the key word. For a hunter classic or derby, full formal attire calls for a white shirt with a white tie. Make sure that your tie won't escape your jacket and distract the judge during your round.

Show jacket 

There are show jackets made specifically for men, and these should be worn rather than a men's suit jacket because they are designed to be ridden in and are cut appropriately to accommodate sitting in the saddle. The colour is up to you, provided it is conservative, but navy is a very safe classic choice and the buttons should match the jacket colour for the hunter and equitation rings. For a hunter classic or derby, the colour should be dark, ideally navy or black.

Number

Your number is to be worn around your waist the same as for women.

Breeches 

There are breeches sold specifically for men, usually designed with more of a relaxed fit than you see in women's breeches. Breeches should be light in colour. Beige (or greenish beige) is appropriate for showing in the hunter ring. White breeches can be worn by men in hunter classics or derbies when full formal attire is called for, but are not appropriate at other times.

Boots

Male hunter riders should wear men's field boots. These are the boots with laces in front, as shown in this photo. There is no way to go wrong with black leather. Be sure to polish your boots to a shine before you show.

Leather half chaps worn with matching paddock boots are allowed but field boots are the better choice.

Spurs

Spurs may be worn but they are not mandatory. Spur straps should be clean and match your boots. There are spurs made for men that are wider to accommodate the width of men's boots.

Gloves

Gloves are not mandatory, either, but they do look much better than bare hands. Black gloves are ideal, but brown gloves can be appropriate if they match the rest of your outfit. White gloves are never appropriate in the hunter ring since the rider is not meant to stand out. Again, there are gloves made specifically for men's hands.


Jumpers

Here are the EC attire rules relating to jumpers that were not mentioned earlier:

ARTICLE G109 DRESS
2. [...] Note that breeches and boots (not half chaps or paddock boots) are mandatory in FEI Children's Jumping classes. Only approved helmets (see Article G102) of a conservative color are allowed.
5. In jumper competitions, in extremely hot weather, riders may, at the discretion of the Competition Committee, be permitted to wear dress or riding shirts with or without chokers and ties or open-neck polo shirts without jackets; no sweatshirts, t-shirts, tank tops or other similar dress will be permitted. Shirts must be neatly tucked into riding breeches.

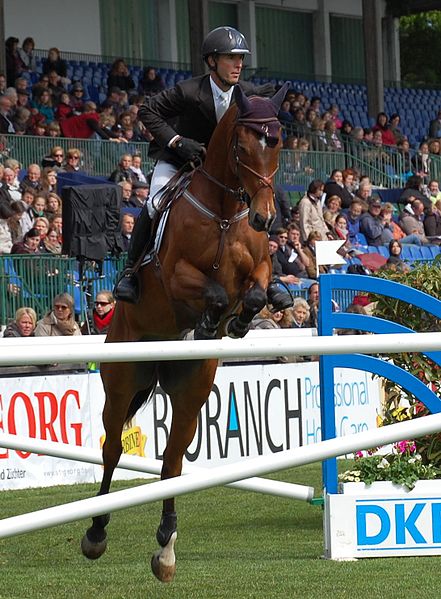
Richard Spooner demonstrating correct
formal attire for the jumper ring
Formal attire

How often you will have to wear formal attire will depend on the individual horse show. Generally speaking, polo shirts are acceptable on weekdays and formal attire (jackets and dress shirts/ties) is required on weekends. It is up to each show to set their own standards for formal attire, however, so some shows will only require jackets on Sundays while others require jackets beginning on Fridays, for example. If you're not sure what to do, ask either the in-gate person or someone at the show office.

Also keep in mind that some classes will require a jacket even when the rest of the classes in the day do not. This usually applies to big-money welcome classes early in the week and jumper equitation classes.

If you wish to look your best at all times, you are free to wear a jacket on informal days even if the other competitors choose not to.

Helmet

Again, helmets are unisex and anything ASTM-approved (check your federation's rules for country-specific requirements) will do.

Steve Guerdat looking very neat and tidy
Hair

While ideally your hair will be kept short enough not to look messy outside of your helmet, you may do whatever you want with it.

Jacket

You can choose any colour or style for your show jacket and again, there are show jackets made for men.

Show shirt

Once again, any colour goes and you can just wear a regular dress shirt. You are free to stand out as much as you would like from your competitors with your shirt and tie, but try to choose a colour that doesn't clash with the rest of your outfit. For formal classes, white is the most appropriate choice, along with a white tie. Ensure that your tie is secured in such a way that it won't fly up during your round.

Polo shirt

If you are allowed to wear a regular polo shirt, it must be tucked into your breeches and it should be one solid colour. No other shirt, apart from a dress shirt, is appropriate as a substitute.

Breeches

Breeches may technically be of any colour, but 99.9% of riders in regular jumper classes will wear beige (or greenish-beige) breeches. Grey breeches are sometimes seen in weekday classes and white breeches are seen in formal classes.

White breeches are generally considered to be "earned" by competing at a certain level. Wearing them before that time can be a bit of a faux-pas. White breeches generally only begin to be worn by the majority of riders at around the 1.20m level and above. If you are competing below that level, beige breeches are the more appropriate choice unless the trend is different in your area.

Boots

Men's field boots are again best choice for the jumper ring, but you are allowed to wear other tall boots such as dress boots instead. You may also wear leather half chaps with paddock boots, but this is not the dressiest choice.

Boots should be cleaned and polished before you enter the ring.

Spurs

Spurs are optional and should be humane in nature, and are again available in men's sizes (make sure that the straps you choose are also in a men's or long size).

Gloves

Gloves are optional as well. If you choose to wear them, a dark colour looks best.

Sunday, June 2, 2013

FAQ, Part 10

What is the proper attire for grooming at a hunter/jumper show?

Normal attire for grooms for the hunter and jumper rings is just jeans and a t-shirt or polo, basically something that can get dirty without being ruined! You should wear whatever shoes you find comfortable, as long as they cover your feet for safety around hooves. Since the groom doesn't usually enter the ring with the horse (unless you're at the Olympics or in a big grand prix where the horse needs to be led in while the rider collects a prize, in which case team clothing might be provided), comfortable clothing is just fine!

What is the best thing to do with a long, thick mane for the schooling level hunter ring?

If you don't want to pull the mane because the horse doesn't show regularly, I would do a neat, tight running braid right up under the crest where from a distance it would look like a mane that's been braided like any other.

If you would like to shorten it, you could cut it to slightly longer than the length you would like it to finish at and then pull it the rest of the way. If you think it could still be hunter-like at its current thickness, you could just cut it, angling your scissors upwards rather than cutting straight across so that the mane will taper slightly and look pulled. Some people have luck using clippers instead of scissors. I've never had much success with any of the so-called humane alternatives to pulling so I either cut with scissors or pull only as often as I need to if the horse is clearly bothered by having its mane pulled. Be very careful if you choose to cut the mane as it needs to remain braidable!

Is it acceptable to put a crystal charm on a hunter braid?

Personally, I would rather just see a nice, uninterrupted line of braids, but if it's a very subtle charm that won't be distracting during a round then it can be acceptable. Use your own judgement to decide if it's something that can be done subtly with your horse and the charms that are available to you.

Can a hunter compete without a noseband?

While the rules do not seem to explicitly state that a noseband must be used, it is the conventional tack and it is expected, with no part of the rules suggesting that a noseband is optional. There are no rules, however, about how tightly the noseband must be done up, so a horse that prefers not to have any pressure there can compete with a loose cavesson.

Can hair bows be used for young pony riders?

Colourful hair bows that attach to the ends of the braids in some young riders' hair are quite popular at the moment. Due to the prevalence of these bows in the pony ring, it would seem that they are being accepted by the judges.

I have found, however, that the bows have gotten bigger and bigger each year, and I think that many are now over-the-top and distracting. Subtle bows in neutral or conservative barn colours are one thing, but layer upon layer of different-coloured ribbon flowing out behind the rider is another. If decorative bows are used, they should really only be used in the short stirrup or small pony classes, or for a small rider on a medium pony. Once a rider graduates to tall boots, they should also graduate to the classic hunter hair because it's no longer time to be "cute".