Sunday, February 28, 2010

Turning Your Horse Out For The Jumper Ring

Jumpers are judged objectively, which means that as long as you are within the rules, how you are dressed cannot affect your placing. This results in a wide variety of turnout standards at horse shows. Taking the time to present yourself and your horse well shows respect for the judge and the horse show (as well as respect for your horse).

What do we look for in a well-dressed jumper?

Cleanliness

Just like in the hunter ring, a jumper will ideally be clean and shiny, with bright white socks. Hooves should be polished to finish off the look. Have a helper at the in-gate with a towel to wipe your horse off before you enter the ring.

Clean, conservative boots

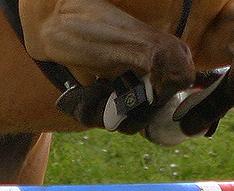
The most common horse boots in the jumper ring are open front boots because these protect the back and sides of the leg while allowing the horse to feel any rails in front. Polo bandages are allowed but are rarely seen because they pad the front of the legs. Regardless of what you choose to put on your horse's legs, the colour should ideally be conservative: black, brown or white.  They should also be clean, which in addition to looking better than dirty boots is also easier on the horse's skin.

Well-fitting tack

Jumpers are allowed to wear a wide range of tack. Whatever you choose to put on your horse, make sure that it fits. Not only does ill-fitting tack look bad, but things like straps that are hanging too low can be dangerous. Check out Chapter 5 of the Equine Canada Hunter, Jumper, Equitation and Hack Rulebook here to see what you are allowed to use.

Conservative saddle pad

Jumpers are usually shown in a square saddle pad, although you are free to use a shaped pad if you prefer that. The most professional-looking horses are those that wear white pads for showing. A black pad can also look good on many horses, but it does not have the same air of formality as a white pad and is therefore more acceptable for weekday classes than for weekend ones. Brightly coloured pads are very difficult to pull off and it is better to leave them at home for schooling.

A fly veil that complements your horse

A beautiful fly veil can make your horse look extra special, while keeping insects out of the ears and also helping to hold in ear plugs if you use them. Fly veils with a fringe are not really acceptable for the show ring. Usually riders will choose a fly veil with a base colour that matches or complements the horse's mane or body colour and then use the piping to throw in a touch of bright colour.

Braids

For special classes, consider braiding your horse. Jumper braids can add a lot of polish to your horse's turnout.

Friday, February 26, 2010

Hunter Pads: Good and Bad

In today's post I hope to show you the difference between a well-fitting hunter pad and a poorly-fitting hunter pad.

Hunter pads are shaped saddle pads made of sheepskin or synthetic fleece. Which material you use will depend on your budget as well as on your personal preference. They are either white or the colour of natural sheepskin. Saddle pads with pockets or room for a number are not appropriate for the hunter ring at open horse shows.

The ideal fit of a hunter pad has one to two inches of saddle pad sticking out evenly on all sides of the saddle. The shape of the pad should match the shape of your saddle. For this reason, you will need to try different pads with your saddle to find the best one for you since there is not one "correct" shape for everyone.

This post provides the names of several brands that offer various sizes and shapes of fitted pads.

Now I will show you some examples of what not to do, followed by some examples of well-fitting pads.

The Bad
This saddle pad does not fit. There is too much saddle pad sticking out behind the saddle and there is not nearly enough in front of it.  It is not simply a matter of shifting the saddle pad forward to make it fit as the shape of the front of the saddle pad is not the same as the shape of the saddle.

This saddle pad does not fit, either. It suffers from the same problems as the first saddle pad, but this time there is too much saddle pad beneath the flap as well. The border created by the pad should be the same size around the entire saddle; if the pad sticks out too much at the bottom then it is too long for your saddle.

This pad is just altogether the wrong shape for this saddle. If you look at the back of the saddle pad, the angle between the back of the flap and the bottom of the panel area is very open, around 135 degrees. If you look at the same angle on the saddle itself, the angle between the back of the flap and the panels is just over 90 degrees. This shape difference causes a large amount of saddle pad to show behind the flap. This pad also needs to be shifted forward so that there is more sticking out in front of the saddle, but that would not fix the problem with the shape behind the saddle.

This is a half pad. There are very few horses out there who are complemented by a half pad, so unless you cannot find any full pad that fits your saddle, it's best to reserve the half pad for schooling, not showing. A half pad tends to make a horse look half-dressed and, in my eyes, ruins the horse's topline by creating a flat picture instead of a round one.


The Good
This pad fits this saddle very well. There is a small border of a consistent size sticking out around the saddle (the part of the pad behind the flap is just obscured by the rider's leg).

This is an example of a sheepskin pad. It also fits the saddle well, with a small border showing around all edges of the saddle, though it could extend a little bit more behind the cantle. This discreet saddle pad allows the focus to shift to the horse.

This pad also fits well. There is an equal amount sticking out on all sides and it fits securely enough that the bottom of the pad has not shifted backwards and created a bulge of material behind the flap as some pads do.

Thursday, February 25, 2010

Turning Your Horse Out for the Hunter Ring

Since hunters are judged subjectively, your horse's turnout is incredibly important. The judge's first impression of your horse or pony is based almost entirely on how well you have turned him out. A shiny, clean, well-braided horse entering the ring will give the judge a much better impression than a dull, dirty, unbraided horse will. That positive impression will make the judge want to give you a good score.

So what constitutes a well-put-together hunter?

Cleanliness

Your horse should be spotless. Give him a full bath either the night before or the day of your show. Any white socks should be bright white - not yellow or brown! If you have trouble keeping socks white, clip the white hair short and use a whitening shampoo on them the morning of your class. Make sure that the socks are completely dry before you put the horse anywhere dirty because any water will attract dirt!

If possible, have someone standing at the in-gate with a towel to wipe your horse down before you enter the ring. Make sure to remove any slobber that was produced during your warm-up and use a brush to clean any sand or mud off of the legs. Repeat after every round so that you go into the ring looking as clean as possible every time.

Braiding

A well-braided horse will look more put together than an unbraided horse, every time. Use hunter braids (I have a post on them here) and either have them done by a professional or, if you decide to do them yourself, make sure that you practice many times beforehand so that they look acceptable for the show ring.

Matching tack

Your clean, well-fitted tack should look like it all belongs together. It doesn't matter if your bridle is made by a different manufacturer than your saddle is, but try to have the colours match as closely as possible so that nothing jumps out as not belonging. Medium brown and dark brown are less likely to draw attention when put together than a light tan and a dark brown would be. Also try not to use tack colours that will clash with your horse or that will really stand out to the observer. The judge should be able to easily focus on your horse rather than on your tack!

The same thing goes for any piece of tack. A fluffy, white girth cover will distract from your horse more than is necessary.

Fitting your saddle pad well

Your shaped white saddle pad should extend from the saddle evenly on all sides and shouldn't be so large that sticks out more than a couple of inches on each side. See this post for examples of well-fitting and ill-fitting saddle pads.

Using legal equipment

I will write a future post on illegal hunter tack, but it is always a good idea to check the rulebook yourself to make sure that whatever you are using is legal and won't get you disqualified! Make sure that you're using a regular cavesson noseband only and no horse boots or bandages.

A well-dressed rider

There's no point in turning your horse out well if you are going to look sloppy yourself. A sloppy rider will distract from the horse and that is the opposite of what you should be doing in the hunter ring. Read this post for tips on hunter rider attire.

Shiny hooves

Use hoof oil on clean hooves to finish off the look. Depending on which brand you use and how you apply it, you may need to re-apply the hoof oil after your warm-up and/or between rounds.

When you put together all of those factors, you will end up with a beautifully turned-out hunter!


Tuesday, February 23, 2010

Shiny Horses

A lot of riders seem to mistakenly believe when they're first starting out in the show ring that they need to cover their horses in Show Sheen to give the coat a nice shine. These Show Sheen-covered horses arrive at the ring with a patchy, unnatural shine that doesn't compare to the other horses. So what's the difference?

It might surprise you to learn that those glossy coats don't come from products like Show Sheen. I rarely use Show Sheen on the body. If I do use it, it's usually just to cover up some unevenness in the coat from a skin issue or other problem. As far as I'm concerned, Show Sheen only belongs in the tail!

So how do those top show horses get that glossy coat? It's a combination of elbow grease and good health. A healthy, pain-free horse on a good feeding program should have a naturally shiny coat. Good grooming will really bring out that shine, but it really does come from the inside out. If, despite a good feeding program and lots of grooming, your horse still has a dull coat, reach for your phone to discuss it with your vet instead of reaching for the bottle of Show Sheen. A dull coat could be caused by ulcers, worms, or other health problems like Cushing's Disease. Covering the dull coat up with a hair polish will never make up for an underlying health issue.

Let's say that your horse already has that healthy sheen and you want to really bring it out for the show ring. What should you do?
  • Don't bathe your horse with shampoo too often. Soap will strip away the natural oils that make your horse shine. That being said, make sure that your horse is perfectly clean for the show. Any little bit of dried sweat left over on the hair will dull the coat and you will need to bathe your horse until the water runs completely clear. Try to reserve the soap baths for the day before your show and just wash with water the rest of the time so that you don't dry out the skin.
  • Get yourself a good curry comb and rub! Currying brings the oils to the surface and nothing will shine your horse up better than consistent, daily currying.
  • Brush off every last bit of dust. Any amount of dust or sand in the coat will make it look duller.   
  • Finish off with a soft towel. Rub your horse with a towel, going with the hair growth. This will remove any last bits of dust and ensure that the individual hairs lie down evenly to best reflect the light.
This routine can take some time to take full effect. Keep it up and you will be rewarded with a beautiful, shiny horse that will be the envy of the horse show! 


Saturday, February 20, 2010

Equitation Divisions

The equitation divisions can be even more confusing than the hunter divisions because the classes are divided between the hunter ring and the jumper ring. I will divide the list of divisions based on whether the classes are hunt seat equitation or jumper equitation. Again, the classes that are offered will vary from show to show, so check each prize list when you're planning out your show season.

Equitation classes are generally a smooth, hunter-type course with slightly more technical elements (rollbacks, broken lines, etc.).

Medal classes incorporate at least two extra tests into the course. These can include things like a trot jump, a halt or counter-cantering a jump.

Hunt Seat Equitation

Junior C Equitation - Open to riders who are under 12 years old on January 1 of the current year. Height depends on size of pony or horse. Jumps for horses are set at 3' (0.90m), jumps for ponies are set as for the Pony Hunter divisions.

Junior B Equitation - Open to riders who are 12, 13 or 14 years old on January 1 of the current year. Height depends on size of pony or horse. Jumps for horses are set at 3' (0.90m), jumps for ponies are set as for the Pony Hunter divisions.

Junior A Equitation - Open to riders who are 15, 16 or 17 years old on January 1 of the current year. Jump height is 3'6" (1.10m).

Children's Equitation - Open to riders competing in the Children's Hunter division. Jump height is 3' (0.90m).

Pony Medal - Open to junior riders. Fence sizes and distances adjusted based on pony size.

Children's Medal - Open to junior riders who do not cross-enter into jumper classes exceeding 3’9” (1.15m), hunter or equitation classes exceeding 3’3” (1.0m). Jump height is 3' (0.90m).

Junior Medal - Open to junior riders. Jump height is 3'6" (1.10m).

Adult-Amateur Medal - Open to amateur riders. Jump height is 3' (0.90m).

Jump Canada Medal - Open to juniors. Jump height is 3'6" (1.10m). There is a jumping phase and a flat phase, with a scoring of 60% over fences and 40% on the flat. Regional finalists compete at the Royal Winter Fair.

Aubert Brillant Medal - Open to juniors and amateurs who are not competing in the Jump Canada Medal at the same show. Jump height is 3'3" (1.0m). There is a jumping phase and a flat phase, with a scoring of 60% over fences and 40% on the flat.


Jumper Equitation

CET Mini Medal (also known as the Francois Ferland Medal) - Open to juniors and amateurs but riders may not cross-enter into the CET Medal at the same competition. Jump height is 3'3" (1.0m). There is both a jumping phase and a flat phase, with a scoring of 60% over fences and 40% on the flat..

CET Medal - Open to riders until the end of the year in which they reach the age of 21. No stallions are permitted. Jump height is 1.10m to 1.15m (3'6" to 3'9"). Riders must be members of the Canadian Equestrian Team. There is both a jumping phase and a flat phase, with a scoring of 60% over fences and 40% on the flat. Regional finalists compete at the Royal Winter Fair.

OHJA Medal - Open to juniors and amateurs who are not competing in hunter divisions set at 3' or under, or in the 1.0m junior/amateur jumpers. Jump height is 3'6" to 3'9" (1.10m to 1.15m).


For the complete rules of the EC-recognized equitation divisions, read chapters 10 and 11 of the EC Hunter, Jumper, Equitation and Hack Rulebook here


Friday, February 19, 2010

Jumper Divisions

In the past, the jumper divisions were almost as confusing as the hunter divisions. Names like Section 1 Jumpers and Low Preliminary Jumpers didn't really mean much unless you had a description to go with them. Nowadays, the jumper divisions have been renamed to incorporate the jump heights into the names so that navigating the various divisions in Canada is, for the most part, very straightforward.

In the US, the junior/amateur divisions are often less clearly defined and the height might vary depending on the competition. Divisions listed as Children's or Adult will be lower than a Junior or Amateur division, with modifiers such as High, Medium, Low or Modified used to further define the heights. Check the USEF rulebook for possible height ranges.

Jumper divisions are either open or restricted to juniors and/or amateurs. Amateurs require an amateur card. Open divisions are open to anyone, professional or not, except in the case of puissance, grand prix or derby classes in which the jump height exceeds 1.50m (juniors are not allowed but amateurs and professionals may compete).

Schooling Jumper - This is a schooling class, set at a height specified in the prize list. The course will generally be simple and inviting while some difficult jumps such as water jumps or banks may be available as options. Clear rounds will often receive a small ribbon.

Pony Jumpers - 0.90m (3'), Open to all ponies but the course (set for large ponies) will not be altered for medium or small ponies. Junior "A" riders may show large ponies only. Ponies may not cross-enter into jumper classes exceeding 3'3" (1.0m) at the same show.

Junior/Amateur 1.0m Jumpers - Open to juniors and amateurs. A horse/rider combination is permitted unlimited upward movement, but downward movement is restricted to only one level. These movements are based on the level of the first class in which they competed.

Junior/Amateur 1.10m Jumpers - Open to juniors and amateurs. A horse/rider combination is permitted unlimited upward movement, but downward movement is restricted to only one level. These movements are based on the level of the first class in which they competed.

Junior/Amateur 1.20m Jumpers - Open to juniors and amateurs. A horse/rider combination is permitted unlimited upward movement, but downward movement is restricted to only one level. These movements are based on the level of the first class in which they competed.

Junior/Amateur 1.30m Jumpers - Open to juniors and amateurs. A horse/rider combination is permitted unlimited upward movement, but downward movement is restricted to only one level. These movements are based on the level of the first class in which they competed.

Junior/Amateur 1.40m Jumpers - Open to juniors and amateurs. A horse/rider combination is permitted unlimited upward movement, but downward movement is restricted to only one level. These movements are based on the level of the first class in which they competed.

Miscellaneous Open Jumpers - The height of each open division will be indicated in the prize list.

4 Year Old Jumper Development - 1.0m to 1.10m, open to all riders. Open to four year-old horses with recognized registration papers showing proof of age. Time allowed set at 300 m/min. Faults will be converted to points for 50% of the score (performance), and 50% of the score will be based on style. Knockdown or first refusal: -5 points off performance score. Time Faults: 1 T.F. = -1 off performance score.

5 Year Old Jumper Development - 1.10m to 1.20m, open to all riders. Open to five year-old horses with recognized registration papers showing proof of age. Time allowed set at 325 m/min. Run under FEI Article 238.2.2 (Table A).

6 Year Old Jumper Development - 1.20m to 1.30m, open to all riders. Open to six year-old horses with recognized registration papers showing proof of age. Run under FEI Article 238.2.2 (Table A).

7/8 Year Old Jumper Development - 1.35m, open to all riders. Open to seven or eight year-old horses with recognized registration papers showing proof of age. Run under FEI Article 238.2.2 (Table A).

Talent Squad - 1.45m, open to all riders.

World Cup Qualifier - 1.60m, open to all riders.

Derby - A derby competition takes place over a longer course, with a distance of at least 1000m and not more than 1300m, with at least 50% of the efforts over natural obstacles. It may be judged under Table A or Table C.

Grand Prix - A grand prix is, quite simply, a class with a big prize. This is usually the highest and most technical class at the horse show.

For complete rules on the various EC-recognized jumper divisions, read chapters 6 to 8 of the Equine Canada Hunter, Jumper , Equitation and Hack Rulebook here

Hunter Divisions

Getting to know the different hunter divisions can be a daunting task because they are not named based on height like the jumper divisions are. Hunter divisions can fit into one of three categories: schooling divisions, experience or age of the rider, experience of the horse. Keep in mind that the divisions offered will vary from show to show and I have not included all of the non-EC divisions, so be sure to check each prize list to see what you have to choose from.

Schooling divisions

The schooling divisions probably have the most confusing names of them all. Who would have thought that Lo/Low Working Hunter would be higher than Low Working Hunter? Schooling divisions are miscellaneous, non-EC classes. Since they are non-EC, specifications may vary and restrictions may be placed on entries, and additional divisions may be used that are not described here.

Schooling - These are classes that can be entered individually and will either run at the height of the first division of the day or, if "open card", will run throughout the day with height changes corresponding to the day's divisions. Classes are generally over fences only.

Low Working Hunter - 2'9", generally offered as a division with multiple over fences classes and an under saddle. Classes can usually be entered individually.

Lo/Low Working Hunter - 3', generally offered as a division with multiple over fences classes and an under saddle. Classes can usually be entered individually.

Hi/Low Working Hunter - 3'3", generally offered as a division with multiple over fences classes and an under saddle. Classes can usually be entered individually.

Rider age or experience

All amateur divisions require the rider to possess an amateur card. These divisions all have multiple over fences classes as well as an under saddle and often must be entered as a whole.

Small Pony Hunter - 2'3" (0.70m), open to ponies not exceeding 12.2 hands. Open to Junior "C" and Junior "B" riders.

Medium Pony Hunter - 2'6" (0.75m), open to ponies over 12.2 hands but not exceeding 13.2 hands. Open to Junior "C" and Junior "B" riders.

Large Pony Hunter - 2'9" (0.85m), open to ponies over 13.2 hands but not exceeding 14.2 hands. Open to all junior riders.

Modified Child/Adult Hunter - 2'9" (0.85m), non-EC, riders may not show in any other division (unless a Modified Child/Adult Equitation division is offered), horses may compete in other divisions with a different rider.

Children's Hunter - 3' (0.90m), open to junior riders. Riders entering this division are not eligible for EC and CET medal classes or any other classes requiring horses to jump, with the exception of the following classes: hunter equitation over fences not exceeding 3’3” (1.00m), pony hunter classes, jumper classes where the fences do not exceed 3’9” (1.15m), hunter classes where the height of the fences does not exceed 3'3" (1.00m).

Junior Hunter - 3'6" (1.10m), open to junior riders.

Adult-Amateur Hunter - 3' (0.90m), open to adult amateur riders. Riders may compete on large ponies. The horse in the adult-amateur hunter division may cross enter into any other division of the competition if eligible but the riders are restricted to the following: adult-amateur hunter classes, hunter classes where the height of the fences does not exceed 3'3" (1.00m), jumper classes where the fences do not exceed 3’9" (1.15m), classes where the horse is not required to jump, hunter equitation over fences for senior riders excepting CET and senior EC medal classes.

Amateur Owner Hunter - 3'6" (1.10m), open to adult amateurs whose horses are owned by the rider or a member of his or her immediate family. Any rider showing in the Amateur Owner Hunter division may not compete on a horse owned by another exhibitor in any other hunter or jumper class at the same competition except in hack or under saddle classes and adult-amateur jumper classes.

Horse experience

These divisions are open to all riders and are usually entered as a whole. Multiple over fences classes along with a single under saddle is the norm.

Baby Green Hunter - 2'9" (0.85m), non-EC, open to horses of any age that have never competed in EC-recognized competitions above 2'6" (0.80m).

Pre-Green Hunter First Year - 3' (0.90m), the horse must not have competed in an EC-sanctioned Gold or Silver competition (or equivalent) in any classes requiring the entry to jump over 2’9” (0.85m) prior to January 1st of the current year.

Pre-Green Hunter Second Year - 3'3" (1.0m), the horse must not have competed in an EC-sanctioned Gold or Silver competition (or equivalent) in any classes requiring the entry to jump over 3' (0.90m) prior to January 1st of the current year.

First Year Green Hunter - 3'6" (1.10m), open to horses of any age that have never competed above 3'3" (1.0m).

Second Year Green Hunter - 3'9" (1.15m), open to horses of any age that have never competed above 3'6" (1.10m).

Regular Working Hunter - 4' (1.20m), open to all horses.

Hunter Classics

Hunter classics are special classes that are open to horses that have shown in at least one other hunter division in the competition. It takes place over a longer course that is first walked by the riders. Numerical scores are awarded with the highest scorers returning for a second round. Restrictions may be made on entries by the competition management.


For complete descriptions and rules of the non-schooling divisions, read the Hunters section (Chapters 2 to 4) of the Equine Canada Hunter, Jumper, Equitation and Hack Rulebook here

Wednesday, February 17, 2010

Jumper Braids

While braiding in the hunters is, for the most part, required, braiding in the jumpers is entirely optional. Some riders choose to have their horses braided for every class, while others reserve braiding for special classes or do not braid at all. Since braids will not affect your score in a jumper class, the choice is entirely up to you.


Braiding adds polish to a jumper's turnout. A loose mane can look messy at times but a neatly braided mane will help make any horse look great. One of the great things about braiding in the jumper ring is that the style doesn't matter! Most braiders will use button braids for jumpers. These are the same type of big, round braids that is seen on many dressage horses. Button braids use larger sections of mane and are therefore fewer in number along the neck than is seen with hunter braids. The exact number will depend on the horse's mane and your preference for looks and braiding time! Other types of braids that are seen in the jumper ring, albeit less often than button braids, are hunter braids and running braids.

Button braids can be created using elastics, thread or yarn. There are several different methods that can be used to create button braids; some braiders prefer to roll the braids up while others prefer to fold them. Braiding with elastics is generally faster than braiding with yarn, but yarn or thread is best in terms of security as they are far less likely to fall out.

The forelock does not have to be braided for the jumper ring. If you do not wish to braid it, the forelock can be left loose or it can instead be covered with a quality fly veil.

While hunters should be braided on the right side of the neck, jumpers can be braided on either side. Usually jumpers are braided on whichever side the mane naturally falls.

Some classes that are run in the jumper ring do expect braided horses. These are jumper equitation or medal classes. Horses can be braided with either hunter braids or jumper braids for such classes, although hunter braids are generally considered to be more acceptable for more formal classes.

For a tutorial on one method of braiding a jumper with yarn, see Foolproof Jumper Braids.

Tuesday, February 16, 2010

Hunter Braids

Braiding your horse for the hunter ring is incredibly important. Your horse's turnout will provide the judge with his or her first impression of your horse. A positive first impression is always better than a negative one, and perfect braids will help put you in the positive category. Beautiful braids also show respect for the judge and everyone involved with the horse show.

There is only one type of braid that is correct for the (non-breed show) hunter ring. They are called hunter braids, or flat braids. These are small braids, averaging between twenty and forty braids along the neck (the number will depend on the length of the neck as well as on the thickness of the mane). They are tied with yarn that matches the colour of the mane. For hunter braids, the mane should be pulled to less than four inches long.

Hunter braids are creating by separating a small section of mane into three pieces and braiding that section down. A piece of yarn, folded in half, is incorporated into the braid about halfway down. Once all of the hair is braided, the yarn is used to tie a knot to secure the braid. A rug hook is then inserted from the crest down under the braid to grab the two loose pieces of yarn. Both pieces of yarn are then pulled up through the base of the braid to the top, folding the braid in half. The yarn is then used to tie the braid in place. Detailed instructions for creating hunter braids can be found in various books and on many websites. The best way to learn is to watch a professional braider at work as there are many little tricks and techniques that are difficult to explain in writing. It is also best to practice braiding many times before braiding for a horse show because your first attempts can be both time-consuming and messy-looking!

The most correct way to braid a hunter is to braid on the right side of the neck. Even if your horse's mane naturally falls to the left, it can actually be easier to braid on the other side because it leaves the loose hairs of the mane out of your way. In such a case, just be careful when you're pulling your horse's mane as you need the hair to be braid-able from the right side, which might result in it not looking too great when it's loose on the left.

The forelock is braided by french-braiding from the bridle path forwards to where the roots end. From there,  incorporate all of the hair and braid it down normally until the braid is long enough that when it is pulled up under the french braid, all of the loose hair will be hidden. Again, yarn is used to tie off the braid and pull it up under the french braided section.

Braiding the mane is best done on the same day as the horse show. Braiding the night before can result in dirty, rubbed-out braids on some horses.

For important classes, most hunters look best with a braided tail. Braiding the tail can make a horse look more refined and more balanced (a thick, unbraided tail can make some horses look like the hind end is longer than it really is). A french braid is used to braid from the top of the tail to the end of the tail bone. There are several different ways to finish the braid. Two techniques that are popular at the moment are the pinwheel (shown at right) and the wrap-around braid.

Make sure that your tail braid is not left in for too long. Horses can pull out a lot of hair by rubbing a tail braid so braid it shortly before your class and then remove it as soon as possible afterwards. Some horses will not tolerate a braided tail. These horses will make it difficult for you to braid in the first place or will not perform as well in the ring with a braided tail. In such cases, leaving the tail loose might be the best solution.

For many photos of beautiful braids as well as some great braiding tips, check out http://topknothorsebraids.blogspot.com

Saturday, February 6, 2010

Providing Proof of Ownership for a Passport

The passport process can get very confusing when it comes to providing proof of ownership of your horse. Equine Canada asks that you provide a copy of one of the following before they will issue your horse a passport:
  • A copy of a bill of sale
  • Breed registration papers stating ownership
  • A sworn and notarized affidavit of ownership
Previously, a notary was not required to produce an affidavit to EC's standards. Starting in 2010, this has changed and the affidavit must be notarized. It is therefore in your best interests, if you have purchased your horse, to make sure that you get a bill of sale in order to avoid having to go through a notary to get a passport.

Also be sure to ask the previous owner whether the horse already has a passport. One horse is not allowed to have multiple passports so you need to be given your horse's passport by the previous owner if it already has one. If you are unhappy with your horse's passported name, don't worry! For a fee, you can send the passport to EC and have the name changed to one of your liking.

Make sure that whatever you send is a copy - no original documents!

Monday, February 1, 2010

How Jumpers Are Scored

At first glance, jumper scoring can appear simple. You need to keep all of the rails up and go fast, right? Actually, that's not always the case. There are several different ways in which jumper classes can be scored, and each variation requires a different plan on the rider's part. You will need to look at each show's prize list or schedule to see how each class will be run. This will also be written on the course diagram before you walk your course. Each variation is called a "table".

I will explain what each table means and then, for extra clarity, I will give you the results from a hypothetical class scored under that table. These are the most common tables used; the rulebook gives a complete list.

Table A (USEF: Table II, Sec. 2(a) and (b))

These are the most common classes that you will see in the jumper ring. It is run over two rounds. In the first round, your only consideration is to have a clear round (no rails or disobediences) without going over the time allowed. All horses tied for first place (which are almost always the 0-faulters) go on to the shortened jump-off course, which can be either immediate (USEF: Table II, Sec. 2(b)) or delayed (run after all riders have completed the first round, USEF: Table II, Sec. 2(a)). In the jump-off, your goal is to keep all of the rails up while going fast. Horses are placed by number of faults first, and then by time when placing within each category of faults. A horse with a rail, however fast, cannot beat a horse that jumps clear.

A rail down or a refusal/circle will cost you 4 faults. Faults are also awarded for going over the time allowed.

If you have faults in the first round, it's usually a good idea to try to finish your round in a fast time in order to place at the top of those with rails.

Table A class

Horse A: 0 faults, 72 seconds
Horse B: 4 faults, 70 seconds
Horse C: 1 fault, 77 seconds
Horse D: 8 faults, 73 seconds
Horse E: 0 faults, 71 seconds
Horse F: 0 faults, 69 seconds

Horses A, E and F will compete in the jump-off. Their jump-off results are:
Horse A: 0 faults, 32 seconds
Horse E: 0 faults, 30 seconds
Horse F: 4 faults, 29 seconds

The results of this class are:
1. Horse E
2. Horse A
3. Horse F
4. Horse C
5. Horse B
6. Horse D

Table A Speed (USEF: Table II, Sec. 1) 

This class is run similarly to the regular Table A class, but there is no jump-off. Instead, the time from the first round will act as the tie-breaker between those with the fewest faults. The strategy in this class is therefore to go as quickly as you can without knocking any rails down from the start.

Table A Speed class

Horse A: 0 faults, 72 seconds
Horse B: 4 faults, 70 seconds
Horse C: 1 fault, 77 seconds
Horse D: 8 faults, 73 seconds
Horse E: 0 faults, 71 seconds
Horse F: 0 faults, 69 seconds

The results are:
1. Horse F
2. Horse E
3. Horse A
4. Horse C
5. Horse B
6. Horse D

Power and Speed (USEF: Table II, Sec. 2(c))

This is a class that is run over a single course, with the jump-off incorporated into the second half. Usually the course consists of around fourteen numbers, with the first "round" being the first seven or eight jumps and the second "round" being the last six or seven jumps. Every horse competes over the first "round", but only those that have not accumulated any faults in the first part of the course can then go on to complete the second part of the course. This is why the first phase is about power - all you need to do is jump clear. The second part is where speed comes in. It is essentially a jump-off that is done without stopping after the first round. Again, keeping the rails up is more important than going quickly.

After each horse has completed the last jump of the first phase, the judge will determine whether they are allowed to continue. If no bell or whistle sounds, the horse is to continue on to the next jump without stopping. If the bell or whistle does sound, the horse must stop and exit the ring without jumping the next jump.

There are variations on the Power and Speed in which all riders are allowed to complete the entire course, but the most common practice is what I described above.

Power and Speed class

Horse A: 0 faults, 4 faults, 32 seconds
Horse B: 4 faults
Horse C: 0 faults, 0 faults, 33 seconds
Horse D: 0 faults, 0 faults, 30 seconds
Horse E: 8 faults
Horse F: 0 faults, 8 faults, 35 seconds

The results are:
1. Horse D
2. Horse C
3. Horse A
4. Horse F
5. Horse B
6. Horse E

Table C (USEF: Table III)

The main difference between Table C classes and the others is that faults are converted to time in Table C. This gives a horse with a rail the chance to beat a horse with a clear round. Each class is run over one round. For each rail down, four seconds are added to the time. At the end of the class, the horse with the fastest time wins.

This format allows riders to take more chances because hitting a rail does not mean that they are out of the ribbons.

Table C class

Horse A: 1 rail, 56 seconds
Horse B: 0 rails, 61 seconds
Horse C: 0 rails, 58 seconds
Horse D: 2 rails, 55 seconds

The adjusted times are:
Horse A: 60 seconds
Horse B: 61 seconds
Horse C: 58 seconds
Horse D: 63 seconds

The results are:
1. Horse C
2. Horse A
3. Horse B
4. Horse D