Thursday, December 11, 2014

Video Roundup

For those who have finished showing for the season, now is the perfect time to practice grooming skills for next year. With so many different how-to videos available on the internet, it can be difficult to know which to follow for instructions, so I've pulled together a selection of videos showing good demonstrations of how to braid, bandage and clip.

All of these skills are best started with the help of an experienced horse person to guide you along, but videos can provide useful preparation, extra tips, or refreshers. 

Wrapping legs


This video does make an error in the direction of bandaging (it should be done, as shown, rather than as said, from the front, around the outside to the back, which is counter-clockwise on the left legs and clockwise on the right), and I prefer to overlap enough not to end up with an extra length of bandage at the end, but it is otherwise a very good demonstration of bandaging a leg. For shipping wraps, purchase a size larger for the cottons and allow the extra cotton to cover the pastern, and then leave just a little bit exposed at the top and bottom after wrapping as you would for a standing bandage (as shown in this video). As far as tightness goes, the bandage should be snug but you should still be able to insert a finger or two between the bandage and the leg.


Hunter Braids (Mane)


The tricks here are mostly to not use too much hair per section, to keep the braid straight while braiding, to braid each section to the same length as the others, and to pull the braid straight up with your pull-through.


Tail Braiding


It takes a lot of patience to learn how to braid a tail, so this one requires a lot of practice both to get the hang of handling all of those strands while keeping them tight, and also to take many small bunches for an elegant look rather than using more hair to get to the end more quickly.


Body Clipping


This is a good overall video, but personally I prefer to overlap my strokes more to prevent lines, and I try to keep all electrical cords safely against the wall away from the horse's legs except for the small section that I need at any given moment.


For those who don't wish to do a full clip, the next video demonstrates very nicely how to clip lines, and it also provides an excellent demonstration of clipping smoothly with an overlap between strokes, and always following the opposite direction of the hair growth.


Saturday, November 22, 2014

Turnout Critique #16

This installment of Turnout Critique features a lovely rider and her grey horse who present an excellent example of good show ring turnout.

Photo used with photographer's permission
Grey horses present an extra challenge for good turnout because their hair stains so easily and is difficult to keep white enough not to look yellow in comparison to white saddle pads and clothing. This horse has been very thoroughly bathed and shows no yellow spots anywhere, not even on the more easily-stained parts of the body such as the legs (there is some reflection of the footing colour on his underside, which just gives the illusion of dirty patches). I suspect that if we could see the tail, the sections that aren't dark hair would be as white as possible, too. This indicates a dedication to frequent bathings to keep such stains from setting.

The mane is neatly braided in the appropriate hunter style, though the contrast between the light body and the dark mane allow us to see that some of the braids have been rubbed slightly. If this horse tends to be a braid rubber, keeping a slinky neck cover on until it's time to tack up could help to reduce the number of damaged braids. 

The tack all appears to be perfectly clean, and the bridle demonstrates proper adjustment; the noseband is set high enough to flatter this horse's face, while the throatlatch is the right length to do its job without being so short that it tightens against the throat, or so long that it swings forward under the cheeks. A D-ring bit such as this one is always an attractive option for a hunter.

I can't tell whether the marks in front of the girth are this horse's colouring or the result of girth rubs. If they are the latter, I would suggest using a girth cover between shows to help prevent them from developing.

The clean saddle pad is nicely chosen to suit the size and shape of the saddle flaps, with the maximum two inches of pad showing evenly all the way around. The excess stirrup leather is slightly longer than I would prefer to see it; ideally it would be three or four inches shorter, or tucked back under the saddle flap.

The hooves are oiled nicely to look clean and tidy, while also showing off how clean the white legs are. This horse has been neatly trimmed, both on the face and the legs, and he and his rider have both obviously been wiped down with a towel before going into the ring to remove any last-minute slobber or warm-up ring dust.

This rider is neatly and conservatively dressed in the appropriate manner for the hunter ring. Her jacket is well-fitted and is the ideal length for her in both the body and the arms. For a more formal occasion I would suggest a darker jacket, but the light grey colour is perfectly appropriate for a regular hunter class. The jacket is accompanied by a classic white show shirt and the appropriate beige breeches with a belt. Her boots are beautifully fitted, coming all the way up to the knee with enough height left over to give lots of flexibility in the ankle area. I would prefer to see more polish to the boots, but it's possible that the lack of shine is due mostly to the cloudiness of the day.

Her clean black gloves and helmet are both very good choices, and her hair is neatly contained in a hairnet in the hunter fashion. I wonder whether this rider's number is tied further above her natural waist than is usual, but the angle of the photo could make the line deceiving.

Overall this rider has done a lovely job of presenting herself and her horse to look their best.

Thank you to this week's featured rider for submitting this photo! Anyone who would like to participate in a future Turnout Critique can send one or more photos to showringreadyblog@gmail.com


Monday, November 10, 2014

Quick Equipment Fixes

We all know that most horse-related things can be fixed with the help of baling twine and/or duct tape. This post will cover some additional easy fixes, as well as some uses of duct tape that you might not have considered.

Leaky hose


A horse show can be a very perilous place for hoses. Being repeatedly dragged over rough ground, around corners, and being stepped on by countless horses, many of them wearing studs, is a surefire way for a hose to end up with a puncture.

Punctured hoses have a tendency to spray water all over the barn aisle, or at whoever happens to be using the hose, but replacing each hose every couple of days to avoid these problems is not realistic.

Wrapping the affected part of the hose in duct tape is a tempting solution, but duct tape doesn't tend to stick well to a hose, even when dry, that has been exposed to so much dirt and that is moved so frequently. Inevitably, the duct tape will peel off after only a few uses.

My solution is to wrap the punctured section in Vetrap. This might sound counterintuitive, but the Vetrap sticks to itself rather than to the hose, ensuring that it will stay put (it's still best, however, to put it on while the hose is dry for best stickability). While the Vetrap is porous, it will lessen the amount of water that can escape and most importantly, the water will soak out in a uniform manner rather than spraying everyone and everything at random.

The Vetrap can also be covered in duct tape, overlapping the edges, to further seal in the water, though this top layer will likely require frequent replacement.


Bucket handle safety caps missing


When carting buckets to and from horse shows, it's quite easy for one of the rubbery protective caps on the handle to pop off and go missing. While this might not seem like a big deal, those caps are there for a reason. Your horse's face will come into frequent contact with various parts of the bucket, and the uncovered bottom of the handle is the perfect shape and sharpness to tear an eyelid or a nostril.

Because the caps can go missing from an otherwise perfectly good bucket, it's handy to be able to fix the problem rather than purchase a brand new bucket every time it happens.

My solution is to take a strip of duct tape and tear it in two so that it becomes about half its usual width. When the bucket is completely dry, wrap this strip of duct tape over the top of the loop in the handle so that the end of the wire is completely covered and there is no open gap, as shown in this photo. Leave enough of the loop open for the handle to remain mobile, and this set-up should last indefinitely (the bucket in the photo has been in constant use for at least two or three years with that same piece of duct tape on it).

Trouble filling hay nets


Certain hay nets can be a pain to fill as they want to fold back into themselves. One possible solution, as shown in the video below (credit goes to YouTube user davegg25), is to use a muck bucket or flake-sized Rubbermaid to keep the empty hay net in a more suitable position for filling.


Broken field boot zipper


This isn't a particularly innovative use for duct tape, but it merits mention because it's an excellent reason to keep black duct tape on hand. With black duct tape applied vertically along the back of the boot, a broken zipper becomes virtually unnoticeable from afar, and it is strong enough to hold the two sides of the boot together for an entire ride.

Blanket surcingles coming undone


You can purchase little rubber rings to slip over the base of the T half of a surcingle buckle in order to keep it snug and lessen the chances of it accidentally coming undone. In a pinch, these rings can be substituted with braiding elastics wrapped snugly around the T.


Sunday, October 5, 2014

FAQ, Part 13

How do I measure for and use a belly pad girth?

Belly pad girths should always have elastic on both ends so that each side can be adjusted to keep the girth centred (not centring the girth would result in the wider part of the girth potentially interfering with the front legs). Girths such as this with "double elastic" have more give to them than the more traditional "single elastic" girths, which can potentially mean sizing down. I find that double elastic girths usually stretch about one inch further (about one billet hole) than girths with elastic at only one end, so if your single elastic girth is already on the long side, size down for a belly pad. If, however, your single elastic girth is verging on too short, you should be fine maintaining the same size.

Elastic often requires some amount of breaking in, so you might initially be worried that the girth is too short until the elastic stretches out.

You can also purchase a belly pad attachment that slides onto a traditional girth, but I find that these tend to hang down and move around more than a dedicated one-piece belly guard girth.

Can you stay in the ring between hunter over fences classes?

If there are no other horses waiting at the ingate and you have cleared your plan with the ingate person before entering the ring, most judges do not mind a horse staying in the ring and completing all of their back-to-back hunter classes at once. If there are other horses waiting to go into the ring, most riders will not appreciate their timing being thrown off by one horse staying in the ring.

If you do choose to stay in the ring, keep in mind that your performance for each class starts from the moment you enter the ring, so ensure that you make it clear where one class ends and the next begins by coming back to a walk before setting up your entrance for the next course, and remember that you are being judged at all times. If you feel the need to shout back to your helpers to remind yourself of the next course, a better idea would be to simply exit the ring for a few moments to gather yourself before starting your next round.

How do you stuff a horse's ears?

Stuffing a horse's ears is a fairly common practice in the hunter and jumper rings to make the horse less reactive to distracting sounds. Jumpers can wear a fly veil over top to help prevent the stuffing from coming out (there are also some fly bonnets designed to muffle sound themselves), while hunters must be stuffed more carefully.

There are various types of "stuffies" available, ranging from fleecy pom pom types to foam plugs to basic cotton. Choose whichever you and your horse are most comfortable with, making sure that the colour is similar enough to your horse's not to stand out. Most products need to be placed fairly deep in order to stay put, but there will still be some part that's visible, especially if your horse shakes them loose at all. Practice riding with stuffed ears at home before attempting it at a show because some horses will object initially.

How long of a pelham shank can I use in the hunter ring?

While there is no set rule (though as always, double check your local rulebook), the shorter, the better. If a shank is so long that it draws your eye to it, it's probably too long. The judge might wonder why the horse needs such a strong bit, especially if you use a lot of curb rein, which could potentially place you below a horse that goes similarly but in a less severe bit. Most hunters that go in a pelham are using something in the range of a Tom Thumb pelham, which has the shortest possible shank length.

What does it mean to "break" a green year?

The horse's green status indicates at what heights it has previously competed, allowing it to compete against horses with a similar level of show experience. There are different green levels depending on horse height (horse vs. pony) and the spectrum of classes offered in any given area. Once a horse has competed at a height that is above what the rules indicate for any given green division, it is said to have "broken" its green status, requiring a higher division the following season. For exact heights and rules, check your local rulebook.


Wednesday, August 27, 2014

Turnout Critique #15

This week's featured horse and rider are doing a lot right already. Our rider should find that a few minor changes to further refine their turnout will have a big impact on the overall picture.


I'm told that this horse usually goes in a front riser pad due to high withers, but he wears a half pad on top of a shaped pad for showing. While this is slightly more attractive than a foam riser pad, it still looks very bulky. Ideally the saddle fit would be such that extra padding wouldn't be necessary. Additional pads can actually make fit tighter, like wearing two pairs of socks, so taking the pressure off one area with extra padding can sometimes make the fit worse elsewhere. For showing, I would consider using the shaped pad with a small pommel pad just over the withers instead of a half pad; this arrangement is fairly common in the hunter ring and adds discrete padding without being bulky. They are available in various forms, from knitted/crochet to fleece to foam, and they can even be done in barn colours because the pommel pad is essentially invisible with the saddle over top. If the saddle fitter agrees with this set-up, losing the bulky half pad will go a long way towards enhancing their turnout. The shaped pad looks like it would probably suit the shape of the saddle nicely in this set-up with just an inch or two of pad showing evenly all the way around.

The bridle is quite thin for this large-boned horse, who could benefit from wider straps to give the illusion of a smaller head. The noseband is also adjusted a little bit low; bringing it up so that it rests an inch or two below the cheek bones would also make his head look more refined by shortening the distance between the browband and the noseband. In the same vein, this large-boned type of horse would benefit from a bit with bigger rings, such as a Hunter Dee bit, though obviously the horse's response to any type of bit is the most important factor. The bridle looks to be clean and in good repair.

The girth does not appear to be as clean as the rest of the tack. The outside of the girth receives dirt and sweat transferred from the rider's boots and the horse's elbow, so it's one piece of tack that really should be cleaned between classes if there is a break.

I am impressed by how white the leg markings are considering they do not appear to have been clipped. Brushing them and possibly applying baby powder or corn starch prior to entering the show ring would help to eliminate the slight brown tinge just above the hooves, and clipping the legs would make the whole process much easier. The white markings would be set off nicely by applying a fresh coat of hoof oil to the feet just before entering the show ring.

Frequent readers of the blog have probably noticed the presence of my pet peeve, the too-long excess stirrup leather. This should either be trimmed or tucked back under the saddle flap to keep it from swinging around and distracting both the judge and the horse. The stirrup irons are a classic style appropriate for both hunter and equitation classes.

This horse has been braided in the hunter style, but over the course of the show day several of the braids have been rubbed out of place. There are a few different ways to prevent this from happening. The first is to make sure that the mane is very clean prior to braiding; this will dissuade the horse from rubbing the braids out himself. Next, when pulling the braids up, make sure that you are inserting the pull-through perfectly parallel to the braid. Any tiny angle will encourage the braids to move out of place. Finally, the shorter the braids, the more sturdy they will be. Long braids leave a tail that can be easily moved around, whereas the bottom of short braids is very close to the knot, making them much more secure.

The tail appears to be flowing nicely as if it has been fully brushed out. For a thick tail like this, the easiest way to keep it from getting clumpy is to shampoo it frequently since dirty hairs tend to stick together, and then brush it out all the way from top to bottom before every class on a show day.

This horse's coat shines deeply, showing that he is well-cared-for. Based on this photo, it looks as though he could use a little bit more weight to cover his ribs better and suit his heavier build. I am also slightly concerned about his feet, which appear to be somewhat chipped. Jumping can be hard on feet and it's possible that this horse might feel more comfortable in shoes, though of course it's impossible to tell from a photo and he could be doing perfectly well barefoot.

Our rider is neatly dressed in suitable conservative attire for the hunter ring. The sleeves of the jacket are too short, but it is very difficult to find a jacket with extra-long sleeves for a long-armed rider off the rack without going custom. The jacket seems to be very clean and nicely fitted through the body, though the overall length might be just a tiny bit short (though in two-point position it is difficult to say for sure). For her next jacket, this rider might consider finding a brand that offers a tall option if her current jacket isn't a "tall" already.

Her breeches are an appropriate beige colour and are again very clean. While her field boots are beautifully fitted, they sport a layer of dust that should in future be wiped off at the in-gate.

The helmet is again a good conservative choice, though at least one big cluster of hair has escaped containment to detract from the overall neatness. It is nice, however, to see a chin strap that appears to be properly fitted instead of hanging too low to be of any use. The rider's black leather or leather-like gloves are also a very appropriate choice for hunter or equitation classes.

It appears that the nostrils and mouth have been wiped off prior to the horse entering the ring, which is very good. It's at this point that the rider's boots should also be included in the towelling.

A few of my suggestions in this critique have involved what to look for when replacing certain pieces of tack or attire in the future. None of these purchases need to be made immediately; they are simply recommendations for what would complement this particular horse or rider that much better when those items do need to be replaced. The remaining suggestions really are very minor changes that will make this pair look that much more professional.

Thank you very much to this week's featured rider for sending this photo in for a critique! Riders interested in being featured in future turnout critiques can e-mail their photos to showringreadyblog@gmail.com


Saturday, August 16, 2014

Bitting Arrangements

Bitting can be complicated, especially when certain bits are made without an obvious orientation or with more rings than there are reins. This aim of this post is to make the process of setting up a new bit easier. These are amongst the more popular bits, and most other styles will follow a similar pattern. Whenever you try a new bit, I strongly recommend that you adjust and use it under the guidance of an experienced horse person.

Dashed lines on the bit diagrams indicate where two sets of reins or a single rein with converters (aka roundings) could be used.

Baucher


The baucher is a snaffle that differs from others in that it has two rings: one for the cheekpiece and one for the reins. This causes it to hang differently in the mouth in a way that some horses prefer, but it also makes it prone to being hung upside down.


There are no options here; the cheekpiece always attaches to the small ring while the reins attach to the ring that contains the mouthpiece.

Elevator/Three-Ring/Four-Ring/Continental Gag/Pessoa Gag


This bit has many names to go along with the many ways in which it can be used!


The cheekpiece always attaches to the small ring at the top, but everything aside from that is an option. Many will ride with a single set of reins on one of the lower rings, which makes it exclusively a leverage bit. Set up in this way, the horse has no relief from the leverage unless contact is dropped entirely. To remedy this, a snaffle rein can be added to the big ring, using either converters or two sets of reins. The lower the ring for the curb rein, the more leverage there will be.

Gag Bit/Running Gag


This bit incorporates both a bit and special cheekpieces which allow the bit to be lifted up in the mouth. The bridle's original cheekpieces must be removed to make room for the gag cheekpieces.


There are two options for using this bit. Many riders will just use the gag attachment with a single set of reins. The severity can be lessened by using, in addition to the gag rein, a snaffle rein attached to the big ring, which keeps the bit from being lifted every time contact is taken. I do not recommend using the snaffle rein without a gag rein attached; this gives the bit the opportunity to bounce freely up along the cheekpieces with every stride, which can be both irritating and confusing to the horse.

Pelham


The pelham is a popular choice for hunters or equitation horses that require more bit than a snaffle.


There are very few options when using a pelham. The cheekpiece will always attach to the top ring, and the curb chain will also attach to the hook there (sometimes the chain is run through the snaffle ring on its way to the hook to stabilize or shorten it). The pelham should be used with either two sets of reins or with rein converters/roundings. In the jumper ring, pelhams are occasionally seen with just a curb rein but this is very severe and should only be used in rare occasions by very talented riders. The reins or converters will always attach to the big ring and to the lower ring. For hunter and equitation classes, check your local rules to find out whether converters are permitted for your jump height and age group.

The tiny ring is for a lip strap, which is the most correct way to use a pelham despite not being very commonly used in the North American hunter/jumper scene. The lip strap is a thin rolled piece of leather that runs through the centre link of the curb chain to keep it flat and still, and it also keeps the bit shanks away from the horse's mouth where they could be grabbed.

Uxeter Kimberwick/Kimberwicke/Kimblewick


The Uxeter or slotted kimberwick is a bit sometimes seen on strong ponies (the pelham is a more appropriate bit in most other cases because the action is more refined).


The cheekpiece will always attach to the small ring at the top, and there is a hole below that ring for the curb chain hook. There are two options for the reins; the upper slot will hold the rein in a position opposite the mouthpiece that will act more similarly to a snaffle, while the lower slot holds the reins in a position to provide stronger curb action. The short length doesn't allow the curb action to ever be truly strong, but this bit isn't generally favoured because there is no relief from that small amount of leverage given that only one set of reins is ever used.


Friday, July 11, 2014

Turnout Critique #14

This week's featured rider is competing in a schooling dressage show, which is not something that every reader of this blog will do, but there is still plenty that can be applied to the turnout of a hunter or jumper.


The very first thing that jumps out at me is something that I see on a large proportion of the horses at any given horse show, and that is a saddle pad whose edge is sitting under the saddle. I'm glad to be able to show an example of this because most riders seem unaware of what this could mean for the horse. The edge of a saddle pad is almost always thicker than the rest of the pad thanks to the layering of finishing materials (and even if it wasn't, there is still a difference in height between the pad and the horse's back). If the saddle is placed over this ridge, it creates a pressure point so that rather than having the saddle evenly disperse pressure across the back, this ridge will dig deeper into the back. While I have never seen a study linking back pain to this type of saddle pad arrangement, it's easy to imagine that it mustn't feel as good as it could for the horse.

For this reason, care should be taken when tacking up to keep an inch of two of saddle pad behind the back of the saddle. If the saddle tends to slip back during the ride while the saddle pad stays in place, a non-stick pad can be created very simply by sewing pieces of grippy non-stick shelf liner to the top of the saddle pad, or by cutting out a pad shape from the shelf liner and placing it carefully where it is needed. The girth tightness should also be checked throughout the ride because this can also be a cause of shifting. I do like the way that the black edging on this pad sharpens the outline on this colour of horse.

I like how neat and tidy this pair look for a schooling show. While I would recommend braiding even for a schooling show when it comes to dressage (and because any kind of braiding is acceptable for dressage, it doesn't have to be time-consuming), the horse is clean and well-brushed, as evidenced by the flow of the tail. It is difficult with some cameras to detect shine indoors, so I will give this pair the benefit of the doubt as the horse appears to be in good condition.

This horse's feathers could be trimmed to present an even cleaner look, which would also help to minimize wet sand from the warm-up ring sticking to the legs as it has here. This is one reason why I like to keep a stiff brush in the ring kit for last-minute leg cleaning. If this were a hunter or jumper show, I would recommend hoof polish to complete the clean picture, although this is a less common practice in dressage.

The tack looks to be clean and well-fitted. An all-purpose saddle like this one is perfectly acceptable for the lower levels of dressage, as would be a jumping saddle for anyone looking to try their hand at it. The bit looks a little bit high, but I suspect that it is just being lifted by the rein contact judging by the movement in the cheek piece.

The rider has presented herself very cleanly and with very well-fitted clothing. My preference, even for a schooling show, is for the rider to wear light (in this case white or beige) breeches, but the black breeches here are spotless. The white polo shirt is very appropriate for an informal schooling show. This rider's field boots are beautifully fitted, coming as far up to the knee as possible and fitting snugly through the leg. They appear to be polished, but the bottoms could still benefit from a towelling just before entering the show ring.

This rider's hair is neatly contained and her helmet appears to be well-fitted, with its strap secured in the keepers where it belongs. Black gloves such as the ones seen here are a good choice for the lower levels of dressage because they help to make hand movements less conspicuous.

The rider appears to be carrying an ordinary crop, which would be acceptable for a hunter or jumper class but will not be very useful in this case. There is no point during a dressage test when it would be appropriate to put the reins in one hand in order to use a crop behind the leg, and hitting on the shoulder is not appropriate in the dressage ring. Riding without a crop or using a dressage whip that can be applied behind the leg without taking a hand off the reins would be more correct.

Overall, for an informal schooling show, this horse and rider look very tidy and most of the changes that I recommend come down to personal preference. I commend them for broadening their horizons beyond the hunter/jumper world.

Riders interested in being featured in future turnout critiques can e-mail their photo(s) to showringreadyblog@gmail.com


Wednesday, June 18, 2014

Fixing an Equine Bad Hair Day

With horses being horses, the only time when you are likely to see a large section of rumpled hair on your horse will be on a show morning. Depending on how your horse lies down overnight, the hair can get bent backwards and if it stays that way, you'll be faced with a fuzzy-looking patch of hair that won't brush back to straightness. Left as is, this will detract from the sleek, shiny coat that you've worked so hard to produce for the show ring.

Thankfully, the solution is easy, though it needs to be done early enough to give the hair time to dry before your classes.

Like human hair, horse hair reverts to straightness when it's wet. The solution, therefore, is to wet the hair, brush it straight and then brush it again once it has dried (a really bad case might benefit from an additional brushing or two while it's still a bit damp).

If you've ever tried wetting the hair and haven't found any improvement, odds are that you didn't wet it thoroughly enough. The hair needs to be soaked down to the skin, coating the entire shaft, so it requires either a sponge that hasn't been wrung out, or a bath. If you have a grey horse, rumpled hair shouldn't be a problem because your morning bathing routine should easily take care of it. If your horse doesn't require a full bath, just take a clean sponge saturated with clean water and really scrub it into the area.

Once the hair is wet, brush the hair straight with a stiff brush. The stiffness will allow the bristles of the brush to reach down to the entire length of the hair. Depending on the severity of the bent hair, you might need to brush it straight again a few times while it's drying and then give it a final smoothing out once it has dried fully.

If you're in a hurry to get to your class you can spray some rubbing alcohol onto the wet spot to help speed up the drying process. If you're in no rush, the alcohol is unnecessary and is likely to do more harm than good by drying out the hair and skin.

If the bent hair is a result of the horse rubbing against the wall or a bucket, the hair can be more damaged than it would have been from the horse simply lying down on it, and it might therefore require the wetting process to be repeated to bring the hair back to its former straightness.


Wednesday, June 4, 2014

Review: Equine Omega Complete

The more we learn about nutrition, the more complicated it seems to become to feed our horses in the best possible way. In recent years, the importance of the correct ratio of omega-3 to omega-6 has become more recognized, and many of the foods traditionally fed to show horses contain far too much of the bad omega-6 fatty acids.

There is evidence for omega-3 fatty acids having an anti-inflammatory effect1, which is beneficial for sport horses. Omega-6s, on the other hand, have an inflammatory effect. Studies have shown that a diet high in omega-3 fatty acids has a beneficial effect for arthritic horses2.

A grass-based diet provides a higher amount of omega-3 than does a grain-based diet3. For show horses who spend most of their time in stalls, and especially those who are fed a lot of grain, adding as little extra omega-6 as possible is important to maintain the best ratio of omega-3 to omega-6.

Traditional fat supplements for horses tend to be extremely high in omega-6s (corn oil is in the region of 1:58 omega-3 to omega-6, and sunflower seeds contain almost exclusively omega-6). Flax seeds and flaxseed oil are essentially the only traditional fat source for horses containing more omega-3 than omega-6.

Vegetable sources such as flax contain short-chain omega-3 fatty acids, while fish oil contains long-chain versions. The body is not very efficient at converting short-chain omega-3 fatty acids to the more desirable long-chain ones, so feeding fish oil allows the long-chain fatty acids to be given directly in the most desirable form.

For all of these reasons, I was very interested to try Equine Omega Complete when I was asked to review it. Equine Omega Complete contains mechanically-expelled soybean oil, human-grade deepwater fish oil, 3000 IU of Vitamin E per daily dose and all eight essential amino acids. I chose two different horses with different needs to see what a month's worth of Equine Omega Complete could do.

Horse A, a thoroughbred, is a fairly difficult keeper who always has a shiny coat but tends to have dry skin, and she is very particular about what she eats. Horse B, a warmblood, will generally eat anything, and suffered this spring from a dull coat.

My initial concern was whether or not the horses would even eat something containing fish oil. I was shocked when my picky eater ate an entire daily dose of Equine Omega Complete in just a small amount of grain without hesitation! The second horse enjoys his Equine Omega Complete so much that he will eat an entire daily dose out of his feed tub with no grain at all. Both horses became more vocal than usual at dinner time while they were on the supplement and clearly enjoyed eating it.

The top photo shows Horse A's weight
on day 1 of Equine Omega Complete,
while the bottom photo shows her
condition after finishing a month of
Equine Omega Complete and
after three weeks of horse shows!
The supplement is very easy to use and my supply came with a convenient measuring cup to give an accurate daily dose. I tried feeding it all at once as well as splitting it into two doses per day, and didn't find much of a difference in terms of results or feed tub leftovers between the two methods. I did find that this supplement didn't pour quite as cleanly (it is quite thick) as other oils that I've used, but the person responsible for feeding the second horse didn't find hers messy so perhaps it depends on your pouring technique. I'm told that Equine Omega Complete now comes with a pump and I suspect that makes it even easier and cleaner to administer.

As far as results go, horse A finished the month shinier than she has ever been, more than she ever was on ground flax or black oil sunflower seeds. While her skin is still on the dry side, it doesn't seem as flaky as it used to be and she has held her weight far better than she usually would through the first few shows of the year.

Horse B has finally developed the deep shine to his coat that has been elusive all year until now.

Neither horse seemed to get "hot" while on the supplement.

It would have been interesting to see whether there were any other improvements visible over a longer period, but over the short term I think that the supplement did all that it could be expected to do. You can read about all of the potential benefits at www.o3animalhealth.com

The only real downside to the product is that it is more expensive than many of the more commonly-used (but high omega-6) oils, but from what I can tell it is similarly-priced to flaxseed oil.

If you are looking for a complete oil supplement to feed to your horse, I would certainly recommend Equine Omega Complete for consideration. While I don't like to promote any one product as a "must have", I can say that it seems to do what it's intended to do and would be a very good option.

Another great thing about Equine Omega Complete is that they give away a free bottle of product every month on their website! Head over there and enter your e-mail address for a chance to win!

Disclosure: I have received no financial compensation for writing this review aside from a sample or copy of the product to be reviewed. My reviews are always my honest opinion and experience. Readers who use reviewed products do so at their own risk.


Monday, June 2, 2014

Young Horse Boots

I have heard of some eliminations as a result of riders not being aware of the new boot rule for young horse classes, so here's everything you need to know if you plan on competing in a young horse class run under FEI rules:

FEI Article 257.2.4

For all international Young Horses Competitions (five *, six, seven and eight year old Horses): All hind leg protections must have a maximum interior length of 16 centimetres; the width of the fastener must be at least five centimeters (refer to FEI Jumping Stewards’ Manual on the FEI website for diagram).

 * NB: Competitions for five year old Horses may only be held at the FEI World Breeding Jumping Championships for Young Horses, unless special authorisation has been granted by the FEI.

The following criteria must be respected in relation to hind boots worn in international Young Horses Competitions (see also the FEI Jumping Stewards Manual on the FEI website):

The inside of the protection must be smooth. Only non-elastic Velcro-type fasteners are permitted; no hooks, buckles, clips or other methods of attaching the fasteners may be used;

The rounded rigid part of the protection must be placed around the inside of the fetlock;

No additional elements may be used in conjunction with the protection.


Here is a page from the Stewards Manual showing examples:


The gist of the rule is that hind boots mustn't have elastic, must have only wide velcro closures, and mustn't have any protrusions on the inside (smoothness refers to a lack of protrusions rather than to a specific type of material, as far as I am aware).

This rule, designed for the welfare of the horse, aims to reduce the practice of over-tightening boots to increase sensitivity and the use of boots designed to exaggerate the movement of the hind end over fences by applying pressure. 

There are not many brands of boots that currently fit these criteria. I am currently aware only of the Young Jump boots made by Veredus that are definitely allowed and will update this post with any others that I come across. There are several basic neoprene types of boots that should fall within the guidelines, but it's best to check in person before purchasing to make sure that there is no elastic on the straps.


Tuesday, April 29, 2014

Hair Net Choices

As more hair net options become available, it can be difficult to know which one to choose without buying and trying them all. Hair nets marketed towards riders are generally thicker and more durable than ordinary hair nets that you might find elsewhere. There are currently three different types of equestrian hair nets (excluding "show bows", which are a big no-no in the hunter/jumper world!), each with their advantages and disadvantages. No type is perfect (unless you're not at all sensitive to knot pressure), so cost, comfort and ease of use need to be weighed against one another while making a choice.

Colour-wise, you should pick one that is closest to your hair colour as the goal is not to have the hair net itself stand out. If there is no exact match, a hairnet that is slightly lighter or darker that your hair colour is not likely to attract attention.

Two-Knot Hair Nets


Two-knot hair nets are the most traditional, they are easy to find and they tend to be the cheapest option available. Having two knots gathering the material makes for a hair net that is essentially the same shape all the way around to keep the hair fairly well-contained without any looser areas to puff out from under the helmet. They are available in a variety of colours to match most hair colours.

Advantages:

  • Inexpensive
  • Available in practically every tack shop
  • Even stretch all the way around
  • Available in a variety of colours

Disadvantages:

  • Knots can cause pressure points under a helmet
  • Don't contain hair well once the net has stretched

One-Knot Hair Nets


One knot hair nets are similar to the two-knot ones but have the advantage of one less pressure point, so you can choose a neutral location to position the knot at. Because of that, however, all the material is gathered at just one end, which creates a more baggy shape, especially as the weave loosens with wear.

Advantages:

  • Single knot can be placed where it won't cause a pressure point
  • Relatively inexpensive

Disadvantages:

  • Single knot causes the shape to be more baggy even before any stretching occurs

No-Knot Hair Nets


No knot hair nets are the newest on the equestrian market, and essentially consist of a wide band that goes around the head, leaving it open on top. They hold the hair tightest and make it easier to style the hair by holding everything in place against the head. For some, using a hair elastic might not even be necessary and they come with a handy storage pouch to keep them away from things like velcro and shavings that can ruin hairnets. Colour choice is the weakness here, with the colours either very light or very dark, and the packaging appears to be a bit misleading colour-wise.
A no-knot hairnet in its pouch (this
is the so-called "medium-brown")

Advantages:

  • No pressure points
  • Seemingly more robust netting
  • Holds hair more closely against the head 
  • Allows the hair to be put up without having to lean over
  • Comes with protective bag to help it last longer

Disadvantages:

  • Comparatively much more expensive
  • The band fits more tightly than the band of a traditional hair net
  • Colour options are limited (good for either very light or very dark hair)
  • Opaque packaging makes it difficult to find the correct colour
  • The band is fairly wide, which could make it blend in to your hair less easily


Thursday, April 10, 2014

Turnout Critique #13

This week's Turnout Critique is interesting because we have photos from a couple of different shows, showing the horse at two different levels of turnout and at two different body conditions.


This rider strikes me as someone who has recently had a growth spurt because while all of her apparel appears to have been chosen with care, several elements are too short. The jacket, while a good dark colour, appears too short, with the waist sitting too high and the bottom not coming far down enough. A good rule of thumb is that the bottom hem at the back of the jacket should just barely brush the seat of the saddle. The field boots are several inches too short and as a result they have dropped below the bottom of the rider's knee. Boots that are too short break up the lines of the leg and can give the illusion of strange proportions. For equitation classes in particular, care should be taken to choose boots that are not too short. When purchasing new boots, plan for them to drop an inch or two (which means that they will feel uncomfortably high on the knee at first).

The upper part of the boot is clean and well-polished, but the foot area appears dull. Unless the ground is so wet that it washes the polish away, polished boots should redevelop their shine after being wiped down. Care should be taken to ensure that the entire boot is polished before showing (and be aware that some leather conditioners can dull the finish and make it difficult for the boots to hold a shine). For an equitation class (which this appears to be), a small spur, even if it is a "dummy" spur, would help to draw the judge's eye to the nicely lowered heel.

This rider's hair is neatly contained in a conservative helmet and hairnet, and she could bring some hair down over her ears to complete the full "hunter hair" look.

She appears to be wearing a belt with her tucked-in show shirt, as is appropriate, and the breeches are well-chosen for their colour and fit, and are clean. Her black gloves are also well-chosen to complete the outfit.


Another reason why it appears that this rider might have had a recent growth spurt is that the saddle seems to be too small, both in the seat and the flap. You should be able to fit about a hand's width between the cantle and your seat, and the flap is almost entirely hidden by the rider's leg. I recommend that this rider work with her trainer and a good saddle fitter to evaluate whether it's time to move to a larger saddle. This does not have to be a huge expense because good quality saddles can be found used for much less than they would cost new.

This rider pointed out herself that the saddle pad is too large, but if the saddle needs to be replaced, the pad might actually end up being the correct size. The outline of the saddle pad, to me, matches the rider's leg better than the flap of the saddle does.

The excess stirrup leather is too long for my taste; I find this to be distracting particularly as a horse canters around, causing it to flap up and down. I would either trim the stirrup leathers so that the ends just extend past the edge of the saddle pad, or tuck the ends under the flap to visually shorten them. The silver-coloured stirrup irons are the correct choice for the equitation ring.

This horse is wearing leather boots, which are appropriate for equitation classes. If this horse were to enter a hunter class, the boots would need to be removed.

The bridle appears to be well-fitted and all of the tack seems to be clean and in good repair.

The horse is nicely braided and appears to have his face trimmed. His tail is sparse and to bring his turnout to the next level, I would try a fake tail when braiding to fill it out a little bit and balance his outline. I'm impressed by the turnout of all of the horses seen in these photos; for a local circuit final, these riders are doing a great job with their overall presentation.

The horse's coat is dull and he is lacking weight. In a case like this, I would seek advice from a vet in case the cause is something health-related such as worms or ulcers. If the horse is deemed to be healthy and just needs more weight, I would try adding oil to the feed for extra calories and to add some shine to the coat.


This final photo was taken some time later, after the horse had gained weight. In my opinion, he could still benefit from gaining a few more pounds and his coat is still on the dull side, so I would continue to lean towards adding oil to the feed if all else has been ruled out and the horse is being deeply groomed on a daily basis.

This time the horse is not braided, but he does have a pulled mane. While I'm told that this was just a local county show, I would still be tempted to braid the mane. Not only is it a good opportunity to practice your braiding skills where slightly less-than-perfect braids won't stand out, but when the horse is looking a bit rough temporarily yet is still capable of showing, putting those extra touches on the turnout is a way of making up for the dull coat or slight thinness. We also know that the peanut gallery will often be quick to criticize without knowing the full story, so putting added effort into the horse's turnout when there are minor issues that you can't control can be a way of expressing that you do care about your horse.  

Most of my comments from the earlier photos also apply to this one. The rider is now wearing spurs, which improve the look of her leg, but she should either trim the straps or tuck them in so that the ends don't hang down so low. The horse's tail looks fuller, either because it has grown out or because it is unbraided. It could probably use an extra brushing out before tacking up to make sure that the strands don't clump together.

When doing "hunter hair", this rider should make sure that some hair comes down to cover the tops of her ears along with the hairnet. In this photo, only the hairnet is over the ear, which creates a line splitting her ear in two.

The horse's white socks look fairly dirty despite the footing not appearing to be very wet, so I would suggest clipping the socks in the future to help keep them clean. Applying baby powder would also help to whiten the socks the day of the show.

Thank you very much to our featured rider for submitting these photos. She's doing a great job and with time and a wardrobe that better suits her height, she and her horse should look like winners. 

If you are interested in being featured in a future Turnout Critique, please send your photos to showringreadyblog@gmail.com

Wednesday, March 26, 2014

Equitation Stirrup Rule Update

When the new stirrup rule was announced for equitation riders, there were many unanswered questions regarding what exactly was meant by the rule and how judges would interpret it. Now that the rule has been in effect for a few months, some more information is starting to emerge. There is still confusion and the rules seem to be interpreted differently between Canada and the United States, but at least there are now some clues available.

The American rule is worded as follows:

EQ110 Appointments
4. The use of stirrups that have entirely black branches is not permitted in any Equitation class. The use of stirrups which have entirely black branches will automatically result in elimination.

The Canadian rule reads:

ARTICLE G1005 TACK AND EQUIPMENT
5. [...] Only silver-coloured stirrups are permitted in equitation or 
medal classes. Use of black or coloured stirrups will incur elimination.*

The American rule is clear on the point that stirrups with small amounts of black on them, such as stainless steel jointed stirrup irons with black joints, are permitted. This has been confirmed by Dover Saddlery, who received this statement from Lauren Fahey, the Director of Hunter Affiliates, USEF: "The rule will apply to stirrups that are entirely black, such as the composite stirrups sometimes used in show jumping. Stirrups with black rubber on the branches that cover a portion of the stainless steel will still be allowed for use in equitation when the new rule takes effect."

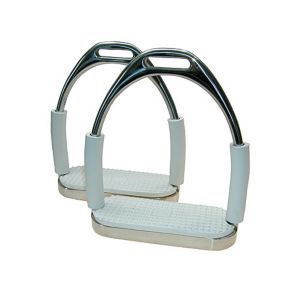
There have been reports of judges in the US eliminating riders for stirrup irons that they consider to be too dark, however, even if the stirrups are not actually black. This has occurred with composite stirrups that were marketed as a good choice for the equitation ring. The safest choice is therefore to either spray paint composite stirrups silver if only dark products are available, or to use a silver-coloured aluminum stirrup or traditional stainless steel stirrup iron (jointed or regular).

In Canada, while the competition season has yet to get into full swing (leaving us waiting to hear how the rule will actually be implemented at shows), apparently the Equine Canada Rules Committee has said that stainless steel stirrup irons with black joints will not be permitted in equitation classes at EC shows. Peacock-style safety stirrups with black elastics will still be permitted

It is not clear whether jointed stirrups with grey joints will be permitted, but I suspect that they will be allowed since the colour is close to silver and the rule is not worded against using jointed stirrups in the equitation ring.

To summarize:

For US equitation classes:
- You may not use stirrups with branches that are entirely black
- You may use silver jointed stirrup irons with black joints
- You risk elimination if you use composite stirrups that are not black, but still dark in colour

For Canadian equitation classes:
- You may not use stirrups that are not silver in colour
- You may not use silver jointed stirrup irons with black joints
- Any colour other than silver, even if metallic, puts you at risk of elimination

*Update to the update:

Jump Canada has released a clarification to make the rule more specific.

G1005.5 will now read:
"Stirrup irons must not be affixed to the rider's foot or boot in any manner. To facilitate the judge's view of the rider's foot position, black or coloured stirrups (other than silver/grey) or stirrups with black or coloured branches are not permitted and, if used, will incur elimination."

G1102.3 will now read:
"To facilitate the judge's view of the rider's foot position, black or coloured stirrups (other than silver/grey) or stirrups with black or coloured branches are not permitted and, if used, will incur elimination."

So grey joints are definitely permissible in Canada, which was also confirmed to me by someone in the know. The rule is still not completely clear on black joints, but I would continue to avoid them based on previous comments from Equine Canada. 


Friday, February 21, 2014

Turnout Critique #12

The first Turnout Critique submission of 2014 is a lovely example of good hunter turnout, with only a handful of minor improvements that could be made.


This horse is in good condition and is groomed thoroughly on a regular basis, as evidenced by the deep shine of his coat. If anything, he might be a little bit too fat, but jumping photos can sometimes be deceiving in that respect. He appears to be quite hot and sweaty, and could possibly benefit from being clipped if this show did not take place on an unusually hot day. The braids are nicely done as far as the photo shows.

All of the white markings have clearly been meticulously cleaned, and this good work would be highlighted by a fresh application of hoof oil to the feet.

The tack all appears to be properly fitted, clean and in good repair. The noseband would flatter the face better if it were put up a hole or two so that it sits just one finger's width below the cheekbone. We are often fooled into judging the size of the head by the length from the browband to the noseband, so the noseband should be kept up near the cheekbones to minimize this distance (bridles stretch over time, therefore this should be checked every so often).

The saddle pad is just the right shape for this saddle, with a very acceptable 1 1/2 inches of pad showing all the way around the edges. The excess length of stirrup leather is just short enough to be tidy without needing to be tucked or trimmed. The tack is a great example of not needing to have everything in the exact same colour. The saddle and girth match, making neither stand out to the eye. The martingale and bridle are darker in colour, but since they are on a separate part of the horse and are in a similar colour family to the saddle, nothing stands out as being different.

This rider is beautifully dressed in well-fitted beige breeches, belt, dark jacket, white show shirt with the now-common wrap collar and conservative black gloves. Her hair is neatly contained in the hunter style and she sports an appropriately conservative helmet by today's standards. My only problem is with her boots, which don't show the high shine of a pair that have been recently polished. She could also ask a groom to brush off the bottoms of her boots after she mounts for a cleaner look. The boots appear to be made of a thin, supple leather, which produces a lovely slim profile but could also require extra time spent polishing due to the leather's more porous surface.

The quality of this horse and rider combination is so high that any turnout faults are very minor. This rider appears to be a great example of someone who puts a strong effort into presenting herself well in front of the judges.

Many thanks to this week's featured rider for putting herself forward for a critique!

Any readers who are interested in being featured in a future edition of Turnout Critique can send photos to showringreadyblog@gmail.com


Friday, January 17, 2014

Is Your Bridle Really Clean?

Have you ever arrived at a horse show with tack that you thought you had cleaned thoroughly the night before, only to find that it looks dull or, worse, has noticeable grime on it? This is an easy situation to get into if you don't clean your tack daily or if you just quickly wipe down your tack without really giving attention to the areas where dirt builds up the most easily. Clean tack is not only a sign of respect for the judge, but it also contributes to that first impression that tells the judge whether or not you are there to win.

Wetting the layer of grime while washing tack can actually make the dirty layer temporarily appear dark and transparent, which is why you often notice the next day, when the tack is dry, that it isn't as clean as you thought it was. Tack that is truly clean has a very recognizable lustre and richness that is well worth the extra effort.

To avoid the surprise of tack that isn't as clean as you thought it was, there are certain areas of the bridle that can serve as warning signs that your tack needs a very thorough cleaning. Because it's difficult to spot the grime once it has gotten wet, I recommend scheduling the intensive cleaning session for at least two days before you show, giving you an opportunity to spot and re-clean any missed areas the next day. 

Here are the areas of the bridle to which you should pay extra attention. Other spots will still need attention, but I have found that these are the most easily missed:

Inside the browband and noseband:


These areas will not be visible while you're showing, but I imagine that horses must appreciate not having sticky, rough surfaces in contact with their faces. Less-than-thorough cleaning here will also often indicate a lack of cleaning elsewhere.

How to clean it: While some prefer to use a toothbrush to get into the small spaces, I actually prefer to scrape out the stitched areas with a fingernail, being careful not to scratch the leather. After a wipe with your soapy sponge, the grime should become soft enough to scrape off, and following up with a clean wet sponge should take care of any remaining residue.

The buckles:


Look closely at the buckles, particularly where the tongue of the buckle rests. Dirt builds up easily on buckles and dulls them. 

How to clean it: Use a wet, soapless sponge to wipe off any dirt. If there is a lot built up, gentle use of your fingernails can again be very effective. Be sure to lift up the various parts in order to clean the buckles thoroughly without leaving grimy edges.

The insides of your reins:


This is one of the worst locations for grime build-up, thanks to the movement of the reins against the often-sweaty neck. Not only does this indicate that your tack needs cleaning more often, but the grime is also visible from the other side under your horse's neck!

How to clean it: Once again, I find my fingernails to be most effective here. Wipe the area down with water and saddle soap to soften the dirt, and then run your fingernail gently down the length of the dirty area, making enough passes to cover the width of the rein. Wipe off any remaining residue with the sponge and then repeat as necessary. Don't forget to pay close attention to the raised strip where the grippy part of the reins begins.

Where the reins attach to the bit:


This area tends to attract a lot of saliva from the mouth, making it both a magnet for little bits of hay and prone to dryness. Keeping it clean (and conditioned) will help the leather last a long time without failing on you mid-ride.

How to clean it: Try to squish your sponge enough that it will fit in there and then expand to pull everything out with it. If that doesn't work, the trusty fingernail/toothbrush or unfastening it to open it all up will do the trick.

The throatlatch:


This is one of the least obvious areas to look at, but it is often dirty! There is an area on each side of the throatlatch, just above the bottom of the horse's chin, where dirt can build up thanks to the motion of the loose leather and any flexing of the head and neck. It usually creates a line that will be slightly dull or appear a slightly different colour than the rest of the throatlatch.

How to clean it: If sponging alone won't do it, gently run your fingernail down the dirty area and then sponge it off. I find that this area is one of the worst for appearing clean when wet and then reverting back to being dull when dry, so pay extra attention to it the day after the thorough tack cleaning.

Some other areas to pay attention to are any with deep stitching (surrounding any raised areas), as well as holes on straps which can become clogged with dirt (the tongue of the throat latch buckle is very handy for cleaning out clogged holes). These areas are, however, easy to clean in a single session and don't tend to suffer from the same level of grime build-up as do the above-mentioned trouble spots. If you are able to keep these five special areas clean, it's likely that the rest of your bridle will end up spotless as well.