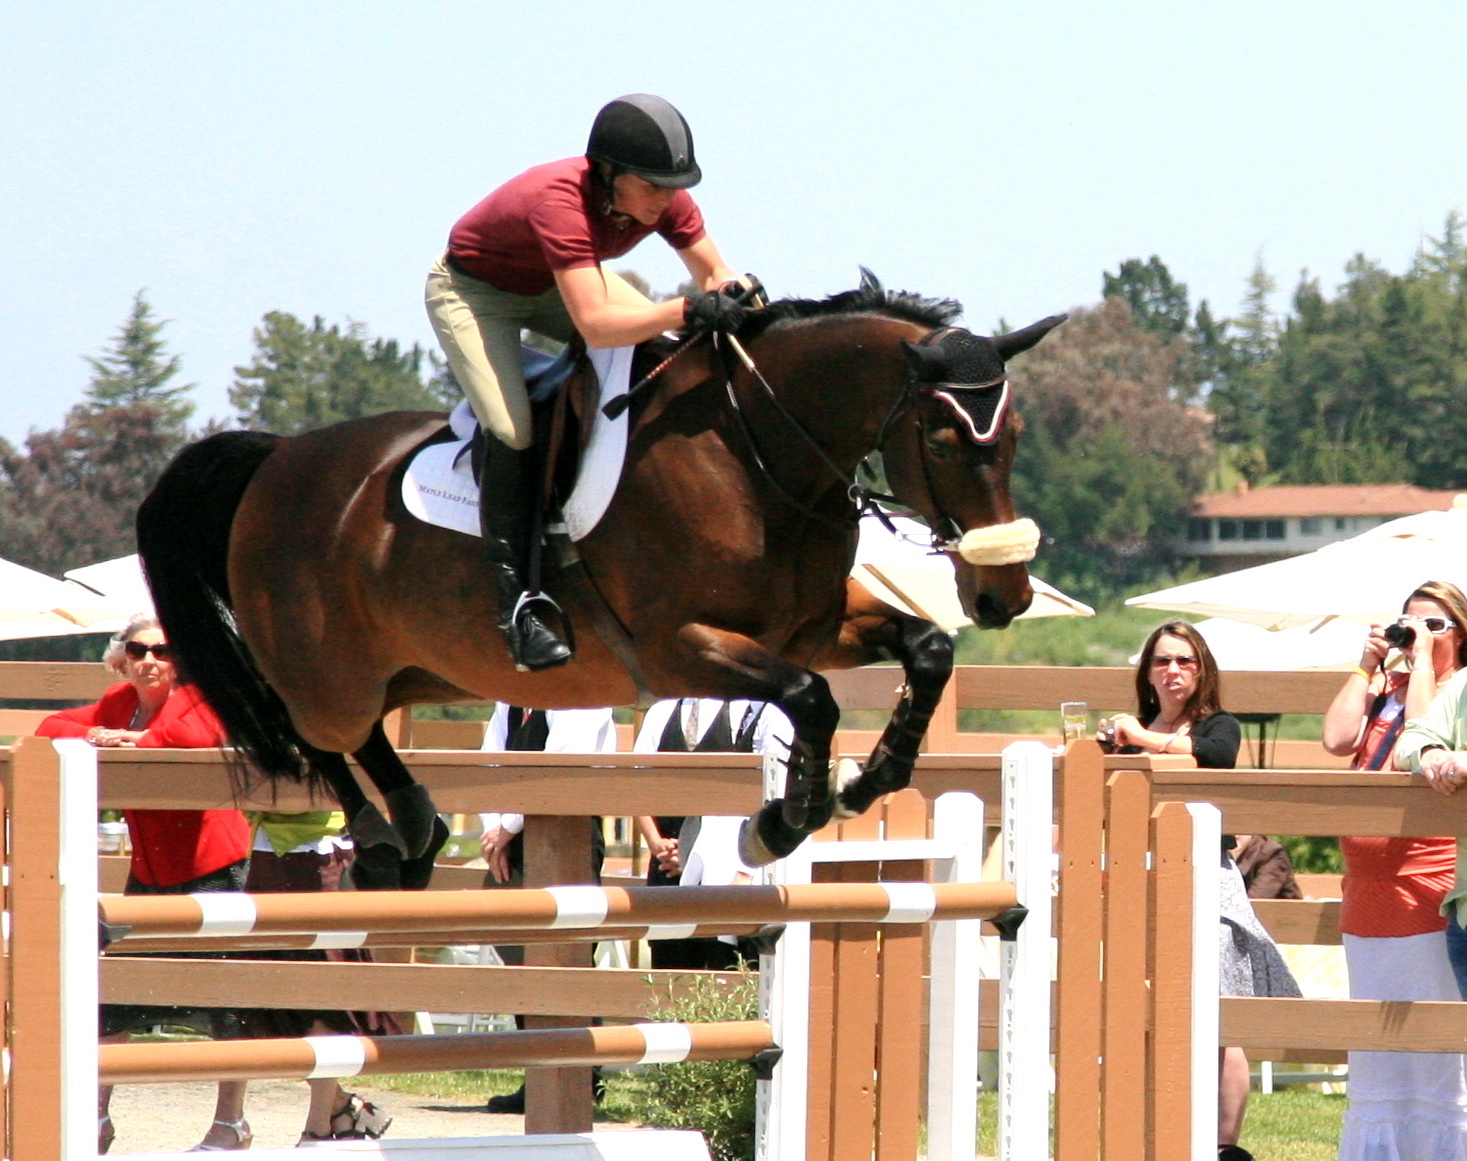
- If your horse starts to act dangerously, leave immediately so as not to put anyone else in danger. Either find another quiet place to ride, or lunge for a while to get the sillies out instead.
- Follow the left-to-left rule. The other riders are expecting for you to pass left-to-left and if you do something different, you'll throw off the whole ring.
- Don't walk on the track. If you're just walking, pay attention to what's going on around you and move out of the way of anyone going faster.
- Give the right of way to those who are jumping. The location of the jumps in the center of the ring can make it difficult to approach them if there are a lot of people flatting. Give others a gap through which to get to the jumps and make sure never to cut across in front or behind the jumps when there is a horse using any of them.
- Give other horses space. Your horse might be used to riding in close proximity to others at home, but other horses might not. Never come right up behind another horse at speed and never get closer than a horse length from the horse in front of you. Respect tail ribbons, too (a red ribbon in the tail means that the horse is a kicker).
- Don't stop in the warm-up ring. If you need to stop for whatever reason, pull over into an unused space or into the hitching area by the in-gate.
- Don't warm up at the wrong time. Double-check with the in-gate before you start warming up to see how far away you are. It does no one any good to have four people warming up at the same time, each thinking that they are 2 away.
- Ask before you jump. If you want to borrow someone else's jump, even just to jump it a single time, ask first. It is the polite thing to do and it will help to make you aware of what the other rider is doing with the jump. It can also be frustrating for the grooms if they need to change the jump and you try to jump it without warning.
- Ground people should ask the current occupants if anyone else is waiting before claiming a jump. It is rude to try to jump ahead of someone else who has been waiting and it wastes your time if you've waited ten minutes for a jump that you can't have.
- Don't run anyone's groom over. That's just rude behaviour.
- In a class with a posted order, use the proper jump. Count the number of jumps in the warm-up ring and then count backward from your spot in the order to determine whose jump you will be using (you will be taking the jump of whoever is that far ahead of you in the order). This gives everyone an equal length of time to warm up and if you don't follow this rule you will confuse people and potentially shorten someone else's warm-up.
- Be on time. No one likes having the class held up by someone who hasn't been able to time their warm-up correctly. Keep on top of things and get to the ring when you're supposed to.
Thursday, March 11, 2010
Warm-Up Ring Etiquette
Riding in the warm-up ring can often be the most difficult part of your ride at the horse show. A large group of horses being ridden at the same time in a confined area can be overwhelming at the best of times, but when you add a set of practice jumps to the mixture it gets even worse! Today I'll list rules for riding in the warm-up ring that will help to give yourself and others the best experience possible.
Wednesday, March 10, 2010
Lunging at the Show
You would think that lunging your horse at a horse show would be a simple matter as all you require is a clear, flat 20m circle to work on. Unfortunately, good footing is usually taken over by mounted riders and it can be difficult to determine where you are allowed to lunge. If you follow these general rules, you shouldn't have to worry about committing any faux pas by lunging your horse where you will upset other riders or the show management.
- Look for signs: If the horse show uses signs to designate different buildings and areas, chances are they will have a sign for the lunging area, too. If there is a signed area, try not to lunge anywhere else.
- Ask: The most reliable information will come from the show office.
- Follow the crowd: If you see multiple people lunging in the same area, it's pretty safe to assume that you are allowed to lunge there.
- Don't squeeze yourself where you don't fit: You don't know which horses in the lunging area might kick or otherwise misbehave (and the others don't know how well-behaved your horse is, either). Don't push it and try to fit yourself into a small space between other horses. Each horse tends to inscribe a circle in the footing that you can see and you should make sure that your horse's circle never touches another. Provide at least 10 metres between lunging circles to prevent accidents. If there's no room for you, wait in line for a space to open up.
- Don't lunge in the warm-up rings: It may be very tempting to do it when you only see a rider or two in there, but don't do it. You will get in the way, even if you aren't aware of it, and no one will appreciate you being there. Warm-up rings are often used as additional lunging areas very early in the morning before the show day begins, but you should leave the area as soon as you see any riders approaching to use the space for its intended purpose.
- Be aware of the other horses: Some horses are much more sensitive than others, and overuse by another handler in the ring of the whip or voice aids can cause those sensitive horses to lose it. If you notice that another horse is being affected by your lunging, tone it down.
- Prepare at home: Lunging areas at horse shows are usually open spaces and a horse that is used to being lunged in a confined area can have some difficulties adjusting. This can cause problems not only for you but for the other horses that need to get out of your way! Make sure that your horse lunges well at home and practice in more of an open area if you can.
Tuesday, March 9, 2010
What to Pack: Stabling at the Show
![]() |
| Tent stalls |
The most common types of show stabling are permanent stalls (usually wooden stalls in a permanent building), semi-permanent stalls (portable stalls in a permanent building) and tent stalls (portable stalls under a tent). Portable stalls can be made of wooden slats, puckboard (increasingly common) or vinyl/styrofoam. The advantage of portable stalls is that they can be reconfigured based on your needs, either to remove a partition to create a bigger stall or to open up a display stall. Permanent stabling is generally stronger, drier and more user-friendly.
![]() |
| Semi-permanent stabling |
Must-haves:
- Buckets and snaps: Bring at least two buckets per horse. You can use one as a water bucket and one as a feed bin or, on hot days, fill both with water so that you don't have to worry about dragging the hose out between classes.
- Hose: Usually there are more groups of horses stabled together than there are hose connections, but it's a good idea to bring your own hose anyway in case someone else forgets to bring one, you're stabled away from others, you need to connect two hoses together to reach your last stall, or there's a separate bathing area without hoses supplied.
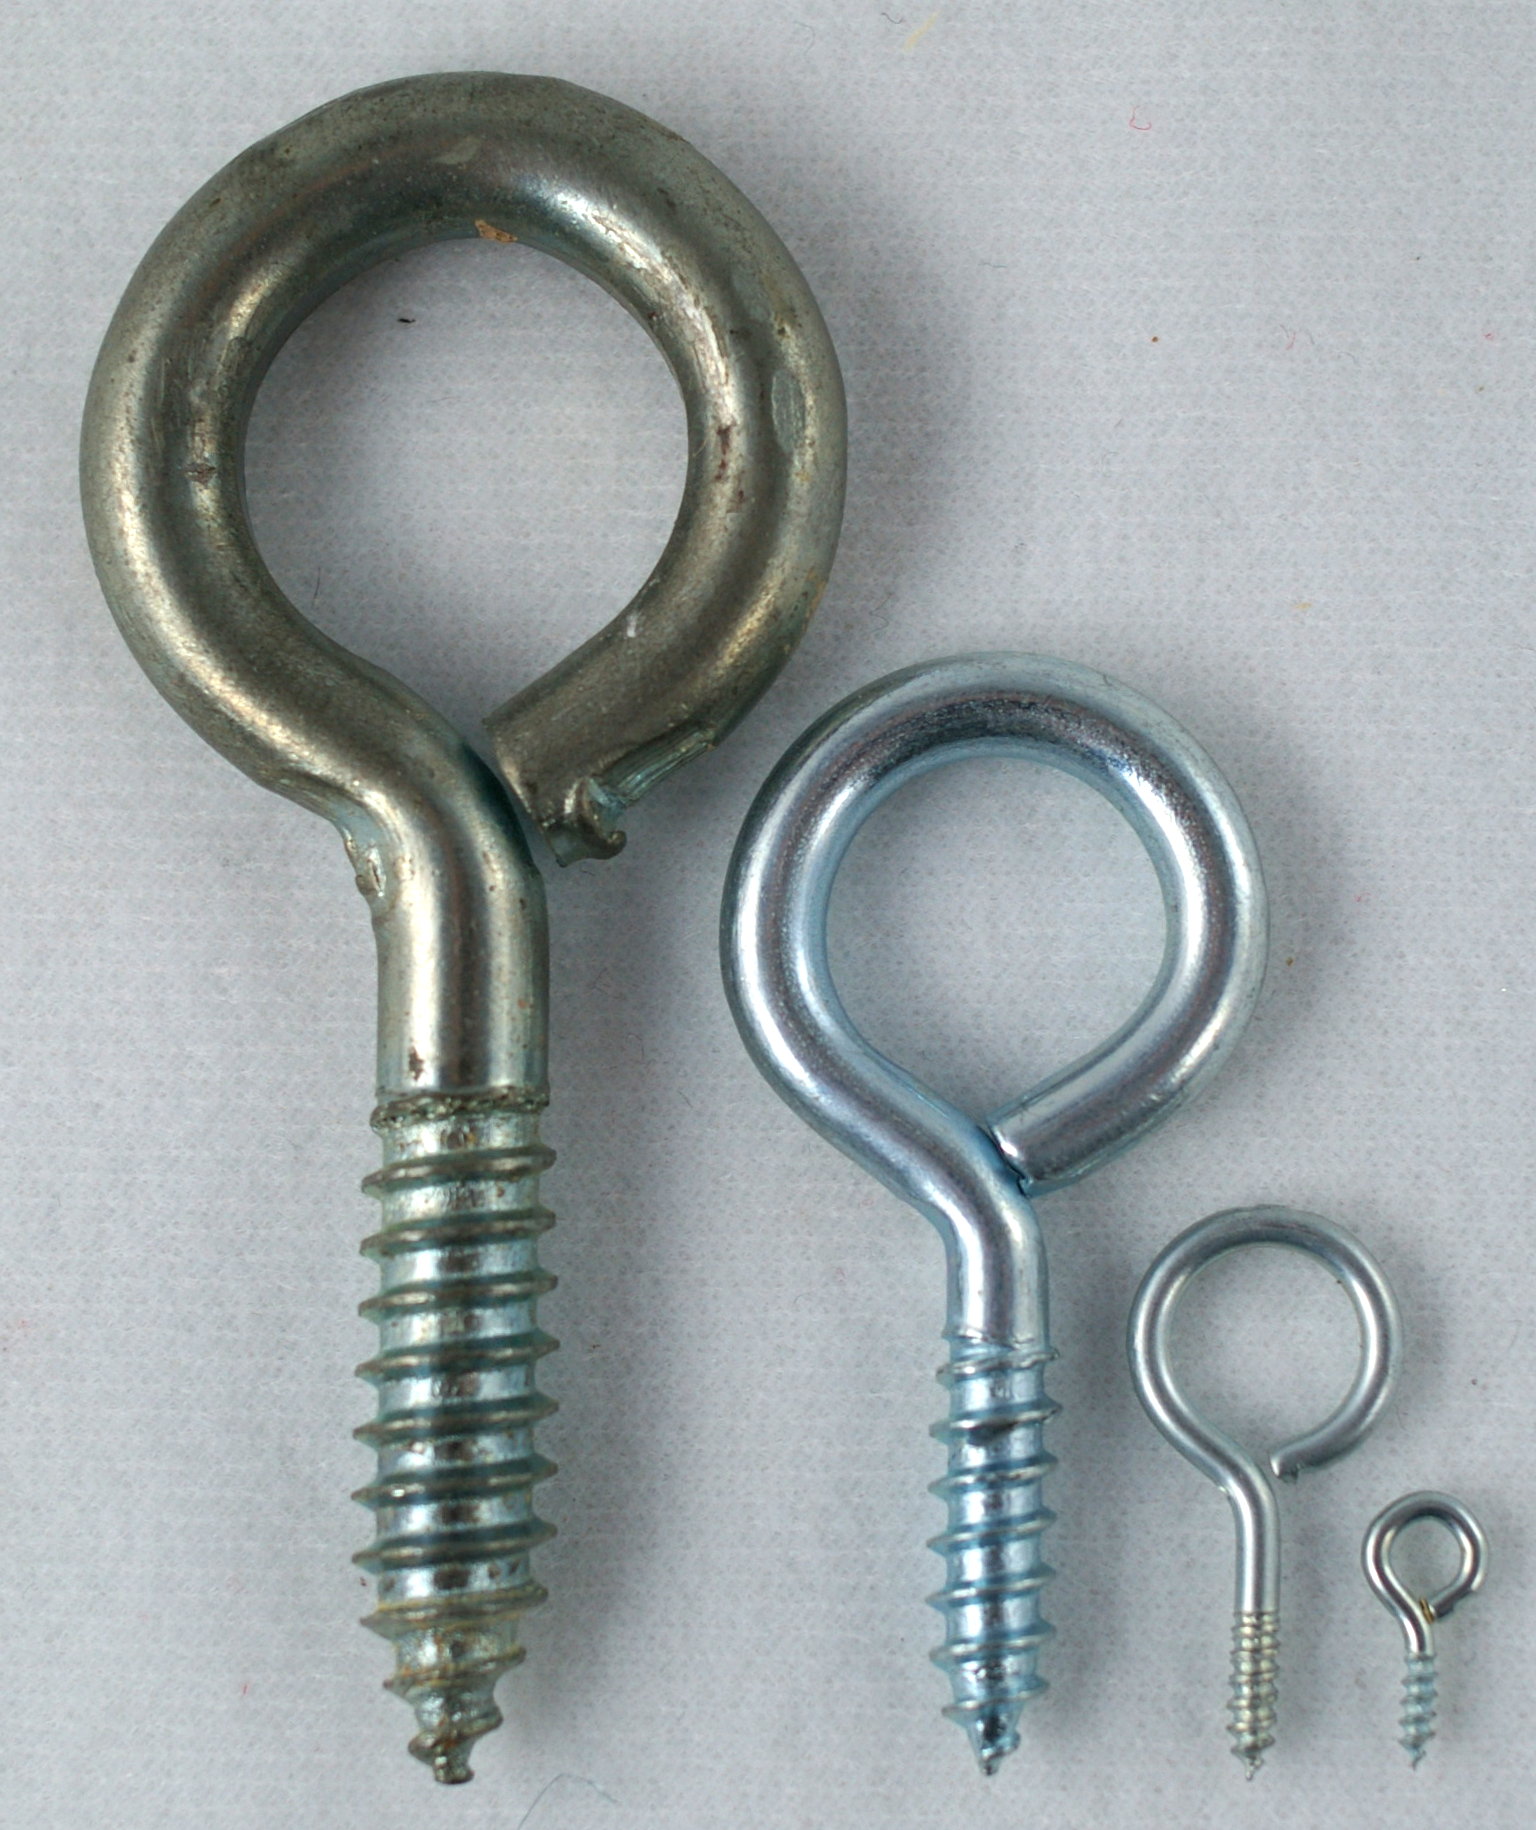
- Screw eyes: Use these to attach your buckets to the wall in wooden stalls. If you're stabled in portable stalls, there will be rings hanging from the walls or you can loop baling twine around a bar and snap on to that.
- Baling twine: Yes, you can take it off of the hay that you bring, but you have the greatest need for baling twine on the arrival day before you have opened any hay. Use it to hang things, tie doors back, create blanket racks, tie tent flaps up, etc.
- Saddle and bridle racks: Pretty self-explanatory!
- Duct tape: Use it to fix hoses, create name plates, tape electrical cords safely, etc.
- Mounting block: It's best to bring your own so that you don't have to ask to borrow someone else's every time you mount up, and you can bring it to the ring with you.
- Wheelbarrow: You will need something to transport manure to the manure pile, and wheels are a must since it can be quite far away.
- Pitchfork: Self-explanatory.
- Rake or broom: Clean up your aisle, both to look good and so that no one else will need to walk through your mess.
- Shovel: If it rains and you're in temporary stabling, chances are you'll be digging trenches.
- Flashlight: The overhead lights often don't work in tent stabling, so a flashlight is needed for night checks.
Bring if you can:
- Hammer and nails: Very useful for setting up a tack room in wooden stalls (remove the nails before you leave).
- Tarp: You can often leave your hay under the overhang between the last stall and the end of the tent or building, but if the overhang is almost non-existent, use a tarp to protect your hay from the rain. You can also bring it to the warm-up ring to use as a liverpool.
- Hose end or pistol: When you're watering horses in a packed aisle, the last thing you want is to get water over everyone's tack boxes and horses. Bringing a hose end will let you shut the water off between horses without going back to the tap (which could be very far away). They're also great to use while bathing your horse to prevent the area from getting too muddy.
- Cross-ties: Use either real cross-ties or extra lead ropes to give yourself a clean area in which to groom horses.
- Stall guards: Sometimes the stall doors can be a pain to open and close. Having a stall guard will allow you to keep the door open when you make trips to and from the tack stall. You can also use stall guards as blanket racks.
- Shelving: Portable shelving is very useful in tack stalls and grooming areas as it allows you to stack vertically instead of having everything on the ground.
- Hay and shavings: You can buy them from the horse show, but they will be expensive so it's best to bring them from home if you have room in your trailer.
- Chairs: Creating a seating area will give you somewhere to rest your feet without getting yourself dirty by sitting on a mounting block or a hay bale.
- Tack cleaning hook: It will be much easier to clean your tack from a proper hook instead of trying to hang it somewhere else where you can't see well or where it risks falling on the ground.
- Extension cord: Use it for fans, clippers, etc.
- Box fan and bungees: Stalls can get hot in the summer so some horses like to have a box fan bungee-corded to the stall front. Make sure to tape the cords well out of the way of teeth.
- Lots of extra snaps and hooks: You never have enough places to hang things in the tack room and snaps get broken or lost. Extra snaps can also be used to add extra security to the metal latches on permanent stalls.
Sunday, March 7, 2010
Recommended Reading
While nothing can replace great coaching, you can learn a lot by reading good books. In today's post I will tell you about some of the books that I have found helpful.
For the hunters:
The first book that I would recommend for a hunter rider is George Morris's Hunter Seat Equitation. It is a classic and it contains lots of photos and explanations of how to ride over fences correctly, as well as exercises that can be used to make your riding better.
Even if you do not plan on competing in any equitation classes, this book will explain how you should be riding in order to show your horse well in hunter classes.
You Be The Judge: Introduction by Ian D. Millar; Foreword by George H. Morris
The next book that I would like to recommend is Randy Roy's You Be The Judge. You can also look for earlier versions, called Here Comes The Judge or The Judge Is Back.
This book is concerned primarily with showing. The author, who judges the hunter and equitation rings, goes through the different classes and explains what he's looking for as well as what he doesn't want to see. You will learn the difference between the major faults and the minor faults and then get a chance to judge "classes" of photos to evaluate your own judging ability. This is a great way to start seeing the world through a judge's eyes.
For the jumpers:
My favourite jumper book at the moment is Training the Modern Jumper by Elmar Pollman-Schweckhorst. It is an honest training guide and it covers everything from choosing the right horse to dressage for jumpers to what modern course design demands from our horses.
This is a very well-rounded look at training, with sections on ethics, hoof care and common lameness problems that affect jumpers included.
For the hunters:
The first book that I would recommend for a hunter rider is George Morris's Hunter Seat Equitation. It is a classic and it contains lots of photos and explanations of how to ride over fences correctly, as well as exercises that can be used to make your riding better.
Even if you do not plan on competing in any equitation classes, this book will explain how you should be riding in order to show your horse well in hunter classes.
You Be The Judge: Introduction by Ian D. Millar; Foreword by George H. Morris
The next book that I would like to recommend is Randy Roy's You Be The Judge. You can also look for earlier versions, called Here Comes The Judge or The Judge Is Back.
This book is concerned primarily with showing. The author, who judges the hunter and equitation rings, goes through the different classes and explains what he's looking for as well as what he doesn't want to see. You will learn the difference between the major faults and the minor faults and then get a chance to judge "classes" of photos to evaluate your own judging ability. This is a great way to start seeing the world through a judge's eyes.
For the jumpers:
My favourite jumper book at the moment is Training the Modern Jumper by Elmar Pollman-Schweckhorst. It is an honest training guide and it covers everything from choosing the right horse to dressage for jumpers to what modern course design demands from our horses.
This is a very well-rounded look at training, with sections on ethics, hoof care and common lameness problems that affect jumpers included.
Saturday, March 6, 2010
Trimming
Trimming refers to removing hair from the ears, jaw, muzzle, bridle path, or legs. Trimming can be a controversial subject because some people believe that removing some of this hair is cruel. In the hunter ring, it is expected that you will trim your horse according to certain standards. These horses do not suffer from being trimmed; fly masks and other protection are generally provided and give the horses, if anything, even better protection than they had before.
Ideally, jumpers will be trimmed similarly to hunters. Because jumpers are judged objectively, however, it is much less of a problem should you choose not to.
Ears
The ears should be clipped so that the edges are smooth and no hair sticks out. Usually, the hair inside the ears is also clipped. In some cases, such as horses with little or very dark-coloured ear hair, clipping the inside might not be necessary. When you are clipping the outer edges of each ear, be sure not to clip off the hair at the very tip of the ear. Removing this "point" of hair will give the ears a strange, rounded shape.
While one might think that removing ear hair is unnecessary, it really does make a difference in how neat the horse looks.
If you do decide to clip your horse's ears, make sure that you use a fly mask when turning out and fly spray around the ears while showing.
For jumpers, trimming the ears is not really necessary if you will always compete in a fly veil.
Jaw
Many horses will grow long hair under the base of the jaw. Not only does this hair make the face look less delicate, but it can also get caught in bridle straps and pull uncomfortably. It is easy to remove this hair with a set of clippers. Make sure not to cut the hair too short or you will end up with a line of trimmed hair against the natural hair of the rest of the face - it should blend and look natural.
Muzzle
The whiskers on the muzzle should be clipped off for a neat appearance. I have yet to witness a horse having trouble in the dark because these whiskers are missing.
Eyebrows
Some people trim the eyebrows (whiskers above the eyes) off completely. I don't feel that this is necessary as these few whiskers do not stand out very much. I also like giving the eyes that little bit of extra protection. If the eye brows are interfering with the horse's eyes or are excessively long, I will trim them down to a more reasonable length.
Bridle path
The bridle path should be clipped, about one to two inches long, just behind the ears where the crownpiece of the bridle sits. The bridle path allows the bridle to sit evenly, makes it easier to bridle the horse and is necessary when braiding the horse.
Tail
For the hunter ring, the tail should never be trimmed at the dock as you would see with dressage horses. Some jumpers will trim the tail at the dock, but it is rare and a natural tail is the way to go. Jumpers' tails are usually banged anywhere from just below the hocks to just above the fetlocks. Hunter's tails usually end around the fetlock area and are usually cut with the aim of achieving a more natural shape.
Legs
How much you should trim the legs depends on the individual horse. Some horses only require the hair at the back of the fetlock to be trimmed, while others grow long hair up to the knee and will need to be trimmed down the back of the entire lower leg.
Thick leg hair can make a horse look coarse and it also makes it more difficult to keep the legs clean. Trimmed legs look neat and make the horse look more delicate.
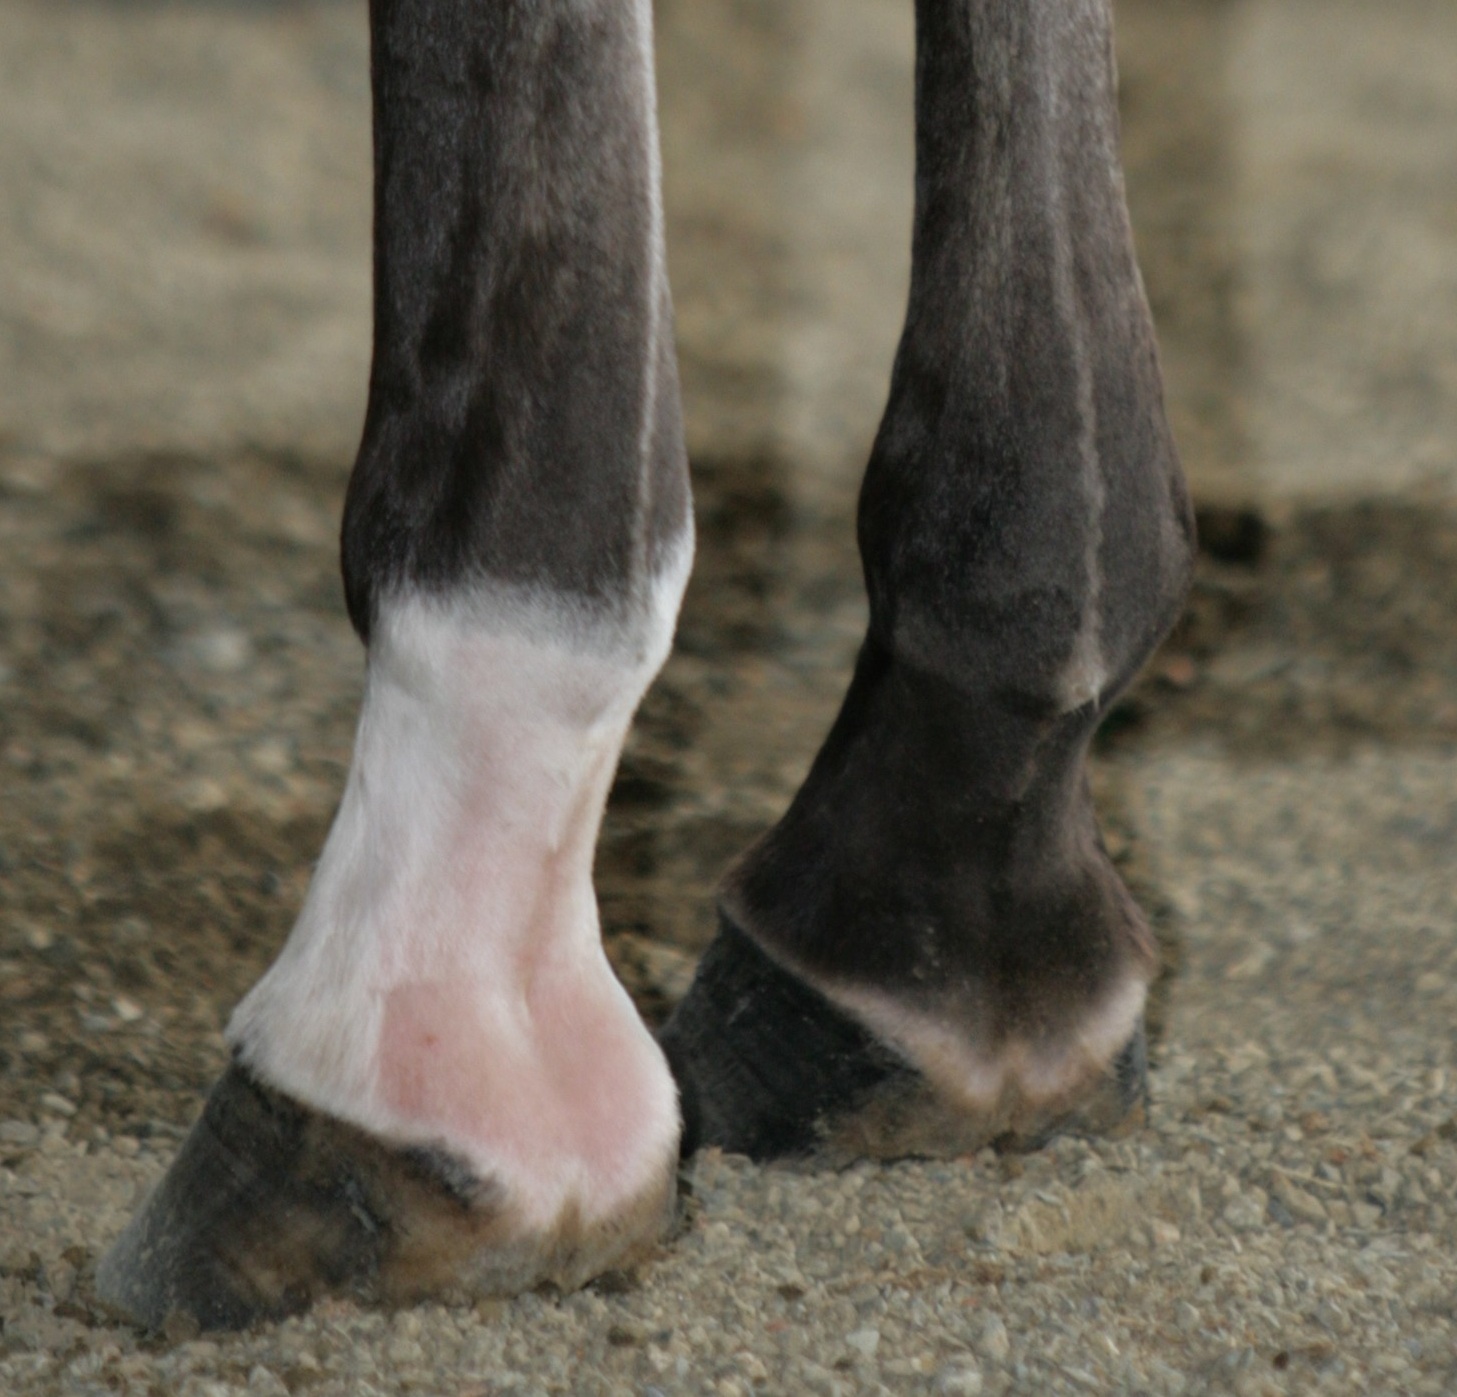
Legs with white markings are often clipped in order to keep them white. Removing the long, stained hair reveals white hair underneath that can be maintained white with shampoo. The short hair will also not accumulate as much dirt in the warm-up ring.
Hair along the coronet band can also be clipped off if it is very long.
Ideally, jumpers will be trimmed similarly to hunters. Because jumpers are judged objectively, however, it is much less of a problem should you choose not to.
Ears
The ears should be clipped so that the edges are smooth and no hair sticks out. Usually, the hair inside the ears is also clipped. In some cases, such as horses with little or very dark-coloured ear hair, clipping the inside might not be necessary. When you are clipping the outer edges of each ear, be sure not to clip off the hair at the very tip of the ear. Removing this "point" of hair will give the ears a strange, rounded shape.
While one might think that removing ear hair is unnecessary, it really does make a difference in how neat the horse looks.
If you do decide to clip your horse's ears, make sure that you use a fly mask when turning out and fly spray around the ears while showing.
For jumpers, trimming the ears is not really necessary if you will always compete in a fly veil.
| Nicely-trimmed ears |
| Hairy ears in need of a trimming |
Jaw
Many horses will grow long hair under the base of the jaw. Not only does this hair make the face look less delicate, but it can also get caught in bridle straps and pull uncomfortably. It is easy to remove this hair with a set of clippers. Make sure not to cut the hair too short or you will end up with a line of trimmed hair against the natural hair of the rest of the face - it should blend and look natural.
Muzzle
The whiskers on the muzzle should be clipped off for a neat appearance. I have yet to witness a horse having trouble in the dark because these whiskers are missing.
Eyebrows
Some people trim the eyebrows (whiskers above the eyes) off completely. I don't feel that this is necessary as these few whiskers do not stand out very much. I also like giving the eyes that little bit of extra protection. If the eye brows are interfering with the horse's eyes or are excessively long, I will trim them down to a more reasonable length.
Bridle path
The bridle path should be clipped, about one to two inches long, just behind the ears where the crownpiece of the bridle sits. The bridle path allows the bridle to sit evenly, makes it easier to bridle the horse and is necessary when braiding the horse.
Tail
For the hunter ring, the tail should never be trimmed at the dock as you would see with dressage horses. Some jumpers will trim the tail at the dock, but it is rare and a natural tail is the way to go. Jumpers' tails are usually banged anywhere from just below the hocks to just above the fetlocks. Hunter's tails usually end around the fetlock area and are usually cut with the aim of achieving a more natural shape.
Legs
How much you should trim the legs depends on the individual horse. Some horses only require the hair at the back of the fetlock to be trimmed, while others grow long hair up to the knee and will need to be trimmed down the back of the entire lower leg.
Thick leg hair can make a horse look coarse and it also makes it more difficult to keep the legs clean. Trimmed legs look neat and make the horse look more delicate.
Legs with white markings are often clipped in order to keep them white. Removing the long, stained hair reveals white hair underneath that can be maintained white with shampoo. The short hair will also not accumulate as much dirt in the warm-up ring.
Hair along the coronet band can also be clipped off if it is very long.
Thursday, March 4, 2010
Bits
In the hunter ring, only a select few bits are allowed to be used. In the jumpers, on the other hand, anything goes as long as it is humane.
Hunters
ARTICLE G202 TACK AND EQUIPMENT
2. Bitless bridles are not permitted in the hunter ring.
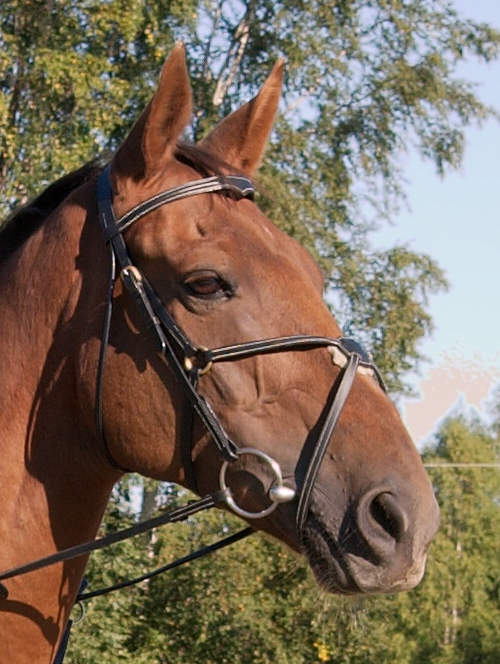
3. Bridle: The bridle may be double, pelham, single (snaffle) or kimberwick. It must be leather (not rubber covered), rolled or plain and may be buckled, sewn or studded (not snapped).
4. Bits: All bits must be humane in nature. Snaffle bits may be with or without cheeks. Wire snaffle bits, either single or double are permissible. It is permissible to use a snaffle with fixed slots for cheek pieces and/or reins. Bit guards are not permissible.
5. Gimmicks: Any gimmicks (e.g. nerve lines, tongue ties, gag bits, any bit that acts as a gag, tack nose bands etc.) are illegal. Nose nets are permissible.
6. Reins: entirely leather of any description, buckled, studded or sewn; single rein pelham and pelham converters are only allowed in junior and amateur classes in 3’ (0.90m) or below. In the case of bad weather, at the discretion of the judge, steward and/or competition committee, rubber reins may be allowed.
Snaffle
Snaffle bits provide the rider with no leverage. You can choose any humane mouthpiece to go with the various snaffle cheeks. The most common snaffle bit in the hunter ring is the Dee-ring. It is an attractive bit while providing some help with turning with more of a loose-ring feel than you would get with a full cheek bit. Full cheek snaffles are also quite common; they provide the same guiding action as the Dee-ring but with less movement. Egg butt snaffles are sometimes seen but they are not as common as the Dee-ring or full cheek. Loose ring snaffles are rarely seen in the hunter ring. This is partly due to style and partly because they can sometimes cause pinching (bit guards are not allowed in the hunter ring).

A single-jointed Dee-ring snaffle

A full cheek snaffle with a single-jointed, single twisted wire mouthpiece.
A double-jointed loose ring snaffle
Pelham
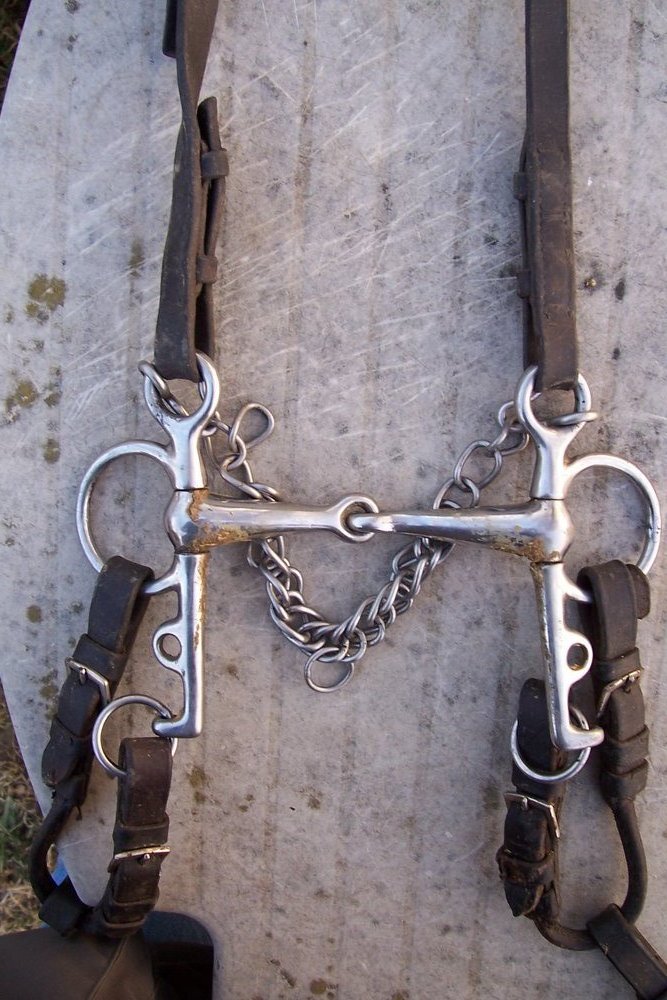
The pelham is the most common leverage bit in the hunter ring. The two reins provide the rider with the ability to vary the amount of snaffle pressure and curb pressure. The mouthpiece can be jointed or straight, and various shank lengths are available for different severities. You may only use a single set of reins (either attached directly to the bit or by using a pelham converter) if you are competing in junior or amateur hunter classes at or below 3' (0.90m) (check your local rules to be sure!). Double reins look much better while providing the ability to adjust the amount of curb used, which cannot be done with a single set of reins.

Kimberwick
The kimberwick is not commonly seen in the open hunter ring. It is a leverage bit that is used with a single set of reins. Having only the one set of reins means that there is no option of using snaffle pressure instead of curb pressure.
Double bridle
The double bridle is not commonly seen in the hunter ring, either. Having both the bradoon (snaffle bit) and the curb bit allows the rider to vary the amount of pressure applied to either.
Equitation
ARTICLE G1005 TACK AND EQUIPMENT
1. Only regular cavessons with snaffles, pelhams, double bridles or kimberwicks are permissible. Pelham converters allowed only in Junior "B" and "C" classes. Reins must be made entirely of leather.
The same bits that are allowed in the hunter ring are allowed in the equitation ring. The only change in the rules concerns which riders are allowed to use pelham converters.
Jumpers

ARTICLE G502 TACK AND EQUIPMENT
c) Reins must be attached to the bit(s) or directly to the bridle. Gags and hackamores are allowed.
Jumpers allow any bit that is used humanely. Most jumpers go in some sort of snaffle, but there are also many that go in a gag bit or a pelham, or no bit at all (a hackamore).
Hunters
ARTICLE G202 TACK AND EQUIPMENT
2. Bitless bridles are not permitted in the hunter ring.
3. Bridle: The bridle may be double, pelham, single (snaffle) or kimberwick. It must be leather (not rubber covered), rolled or plain and may be buckled, sewn or studded (not snapped).
4. Bits: All bits must be humane in nature. Snaffle bits may be with or without cheeks. Wire snaffle bits, either single or double are permissible. It is permissible to use a snaffle with fixed slots for cheek pieces and/or reins. Bit guards are not permissible.
5. Gimmicks: Any gimmicks (e.g. nerve lines, tongue ties, gag bits, any bit that acts as a gag, tack nose bands etc.) are illegal. Nose nets are permissible.
6. Reins: entirely leather of any description, buckled, studded or sewn; single rein pelham and pelham converters are only allowed in junior and amateur classes in 3’ (0.90m) or below. In the case of bad weather, at the discretion of the judge, steward and/or competition committee, rubber reins may be allowed.
Snaffle
Snaffle bits provide the rider with no leverage. You can choose any humane mouthpiece to go with the various snaffle cheeks. The most common snaffle bit in the hunter ring is the Dee-ring. It is an attractive bit while providing some help with turning with more of a loose-ring feel than you would get with a full cheek bit. Full cheek snaffles are also quite common; they provide the same guiding action as the Dee-ring but with less movement. Egg butt snaffles are sometimes seen but they are not as common as the Dee-ring or full cheek. Loose ring snaffles are rarely seen in the hunter ring. This is partly due to style and partly because they can sometimes cause pinching (bit guards are not allowed in the hunter ring).
A single-jointed Dee-ring snaffle
A full cheek snaffle with a single-jointed, single twisted wire mouthpiece.
A double-jointed loose ring snaffle
Pelham
Kimberwick
The kimberwick is not commonly seen in the open hunter ring. It is a leverage bit that is used with a single set of reins. Having only the one set of reins means that there is no option of using snaffle pressure instead of curb pressure.
The double bridle is not commonly seen in the hunter ring, either. Having both the bradoon (snaffle bit) and the curb bit allows the rider to vary the amount of pressure applied to either.
Equitation
ARTICLE G1005 TACK AND EQUIPMENT
1. Only regular cavessons with snaffles, pelhams, double bridles or kimberwicks are permissible. Pelham converters allowed only in Junior "B" and "C" classes. Reins must be made entirely of leather.
The same bits that are allowed in the hunter ring are allowed in the equitation ring. The only change in the rules concerns which riders are allowed to use pelham converters.
Jumpers
ARTICLE G502 TACK AND EQUIPMENT
c) Reins must be attached to the bit(s) or directly to the bridle. Gags and hackamores are allowed.
Jumpers allow any bit that is used humanely. Most jumpers go in some sort of snaffle, but there are also many that go in a gag bit or a pelham, or no bit at all (a hackamore).
Labels:
Equitation,
Hunters,
Jumpers,
Tack
Wednesday, March 3, 2010
What to Wear: Jumper Rider Edition
Jumper riders are less bound by traditional dress than are hunter riders. As long as you abide by the Equine Canada rules, you should be allowed to compete. Dressing yourself well shows respect for those around you, so it is best to put in an effort even though you are not judged on it.
ARTICLE G109 DRESS
1. All competitors must be properly dressed in the confines of the arena. This includes the inspection of the course and at the presentation of prizes.
2. Competitors should be neatly and suitably dressed in coat, shirt and tie, choker or stock, breeches or jodhpurs and boots. Black or brown smooth leather half chaps are permissible providing they match the boot colour.
Note that breeches and boots (not half chaps or paddock boots) are mandatory in FEI Children's Jumping classes. Only approved helmets (see Article G102) of a conservative color are allowed.
3. If competitors are not suitably dressed, the judge may refuse to allow them to compete.
...
5. In jumper competitions, in extremely hot weather, riders may, at the discretion of the Competition Committee, be permitted to wear dress or riding shirts with or without chokers and ties or open-neck polo shirts without jackets; no sweatshirts, t-shirts, tank tops or other similar dress will be permitted. Shirts must be neatly tucked into riding breeches.
6. At all EC-sanctioned competitions, anyone mounted on a horse must wear the required headgear (see Article G102.1) as well as safe, appropriate footwear.
Formal attire
How often you will have to wear formal attire will depend on the individual horse show. Generally speaking, polo shirts are acceptable on weekdays and formal attire (jackets and show shirts) is required on weekends. It is up to each show to set their own standards for formal attire, however, so some shows will only require jackets on Sundays while others require jackets beginning on Fridays, for example. If you're not sure what to do, ask either the in-gate person or someone at the show office.
Also keep in mind that some classes will require a jacket even when the rest of the classes in the day do not. This usually applies to big-money welcome classes early in the week and jumper equitation classes.
If you wish to look your best at all times, you are free to wear a jacket on informal days even if the other competitors choose not to.
Helmet
Style-wise, anything goes as long as the helmet that you choose is ASTM approved.
Hair
Ideally, you will wear your hair in a hairnet as you would in the hunter ring. Some long-haired jumper riders, however, choose to wear their hair in a low, loose ponytail or in a braid and while this does not look as neat, it is allowed.
Jacket
You can choose any colour for your show jacket. Common colours are navy blue, black and grey. Jackets can be customized with coloured piping and different designs in the fabric. Try to stay away from jackets that make you look like you belong to a national team unless you really do!
Show shirt
Once again, any colour goes. You are free to stand out as much as you would like from your competitors, but try to choose a colour that doesn't clash with the rest of your outfit. For formal classes, white is the most appropriate choice but light colours are acceptable. Make sure that you wear the provided choker over your collar.
Polo shirt
If you are allowed to wear a polo shirt, it must be tucked into your breeches and it should be one solid colour. No other shirt, apart from a show shirt, is appropriate as a substitute.
Breeches
Breeches may technically be of any colour, but 99.9% of riders in regular jumper classes will wear beige (or greenish-beige) breeches. Grey breeches are sometimes seen in weekday classes and white breeches are seen in formal classes.
White breeches are generally considered to be "earned" by competing at a certain level. Wearing them before that time is a bit of a faux-pas. White breeches generally only begin to be worn by the majority of riders at the 1.20m level and above. If you are competing below that level, beige breeches are an appropriate choice unless the prize list indicates otherwise.
Boots
Field boots (the tall boots with laces in front) are the best choice for the jumper ring, but you are allowed to wear dress boots instead. You may also wear leather half chaps with paddock boots, but this is not the dressiest choice.
Boots should be cleaned and polished before you enter the ring.
Spurs
Spurs are optional and should be humane in nature.
Gloves
Gloves are optional as well. If you choose to wear them, a dark colour looks best.
ARTICLE G109 DRESS
1. All competitors must be properly dressed in the confines of the arena. This includes the inspection of the course and at the presentation of prizes.
2. Competitors should be neatly and suitably dressed in coat, shirt and tie, choker or stock, breeches or jodhpurs and boots. Black or brown smooth leather half chaps are permissible providing they match the boot colour.
Note that breeches and boots (not half chaps or paddock boots) are mandatory in FEI Children's Jumping classes. Only approved helmets (see Article G102) of a conservative color are allowed.
3. If competitors are not suitably dressed, the judge may refuse to allow them to compete.
...
5. In jumper competitions, in extremely hot weather, riders may, at the discretion of the Competition Committee, be permitted to wear dress or riding shirts with or without chokers and ties or open-neck polo shirts without jackets; no sweatshirts, t-shirts, tank tops or other similar dress will be permitted. Shirts must be neatly tucked into riding breeches.
6. At all EC-sanctioned competitions, anyone mounted on a horse must wear the required headgear (see Article G102.1) as well as safe, appropriate footwear.
Formal attire
How often you will have to wear formal attire will depend on the individual horse show. Generally speaking, polo shirts are acceptable on weekdays and formal attire (jackets and show shirts) is required on weekends. It is up to each show to set their own standards for formal attire, however, so some shows will only require jackets on Sundays while others require jackets beginning on Fridays, for example. If you're not sure what to do, ask either the in-gate person or someone at the show office.
Also keep in mind that some classes will require a jacket even when the rest of the classes in the day do not. This usually applies to big-money welcome classes early in the week and jumper equitation classes.
If you wish to look your best at all times, you are free to wear a jacket on informal days even if the other competitors choose not to.
Helmet
Style-wise, anything goes as long as the helmet that you choose is ASTM approved.
Hair
Ideally, you will wear your hair in a hairnet as you would in the hunter ring. Some long-haired jumper riders, however, choose to wear their hair in a low, loose ponytail or in a braid and while this does not look as neat, it is allowed.
Jacket
You can choose any colour for your show jacket. Common colours are navy blue, black and grey. Jackets can be customized with coloured piping and different designs in the fabric. Try to stay away from jackets that make you look like you belong to a national team unless you really do!
Show shirt
Once again, any colour goes. You are free to stand out as much as you would like from your competitors, but try to choose a colour that doesn't clash with the rest of your outfit. For formal classes, white is the most appropriate choice but light colours are acceptable. Make sure that you wear the provided choker over your collar.
Polo shirt
If you are allowed to wear a polo shirt, it must be tucked into your breeches and it should be one solid colour. No other shirt, apart from a show shirt, is appropriate as a substitute.
Breeches
Breeches may technically be of any colour, but 99.9% of riders in regular jumper classes will wear beige (or greenish-beige) breeches. Grey breeches are sometimes seen in weekday classes and white breeches are seen in formal classes.
White breeches are generally considered to be "earned" by competing at a certain level. Wearing them before that time is a bit of a faux-pas. White breeches generally only begin to be worn by the majority of riders at the 1.20m level and above. If you are competing below that level, beige breeches are an appropriate choice unless the prize list indicates otherwise.
Boots
Field boots (the tall boots with laces in front) are the best choice for the jumper ring, but you are allowed to wear dress boots instead. You may also wear leather half chaps with paddock boots, but this is not the dressiest choice.
Boots should be cleaned and polished before you enter the ring.
Spurs
Spurs are optional and should be humane in nature.
Gloves
Gloves are optional as well. If you choose to wear them, a dark colour looks best.
Labels:
Jumpers
Subscribe to:
Posts (Atom)