Showing posts with label Stabling. Show all posts

Tuesday, December 3, 2013

Stabling vs. Shipping In

If a show is a relatively short drive away, you will often have the option of either shipping in every day or renting a stall. Even for a single-day show, day stalls or overnight stalls are sometimes available. There is no clear-cut answer as to what the best option will be for you; each option has its upsides and its downsides, and you will need to determine which are most important to you.

To help with that decision, here is a list of pros and cons related to each option:

Stabling (overnight)


Pros


  • Horse settles in on the first day, stays quieter throughout the show
  • The cost of the stall could work out to less than the cost of gas for shipping back and forth over multiple days
  • Horses can be safely left alone in their stalls
  • Stalls are often located near the show rings, closer than the ship-in parking
  • Horses drink and eat more readily, and are comfortable urinating
  • Easy location if using a professional braider
  • No ship-in fee

Cons


  • The cost of the stall
  • The cost of bedding down the stall (at an average of $6 to $8 per bag if buying from the show)
  • Having to stick around or come back for night check if not staying nearby
  • The time and manpower to load/unload all of the equipment and hay/grain/shavings being brought
  • No turnout unless the show has paddocks for rent

Shipping in


Pros 


  • Costs the least for a single-day show, and could cost less for a multi-day show, depending on distance
  • Horse gets to sleep at home in a comfortable environment and maybe get some turnout if the show days are short
  • Less to pack and unpack
  • No need to go to the show on days when you aren't showing
  • No extra barn chores besides those already being done at home

Cons


  • Some shows charge a ship-in fee that could offset any savings on the stall once the cost of gas is added in
  • Difficult to handle multiple horses, especially with certain trailer configurations in which the horses can't be accessed individually
  • The horses arrive excited each day, which could make a hot horse more difficult to handle 
  • Earlier mornings in order to load up and arrive in time for the first class
  • Ship-in parking can be far from the show rings
  • Space can be limited around the trailer if the parking area is small
  • Difficult to leave one horse alone if another needs to be at the show ring
  • Some horses won't drink or urinate on the trailer
  • The horses might need to be held outside of the trailer if the day is warm
  • Extra time at the end of the day to drive home and settle the horses back in
  • Difficult loaders might not want to get on and off the trailer repeatedly and therefore need to be held between classes

Day stall


Pros


  • Easier handling of horses than on the trailer (ability to access them individually)
  • Other horses nearby to keep a single horse company
  • Horses are more likely to drink and urinate in a stall
  • Stalls are often located near the show rings, closer than the ship-in parking
  • Easy location if using a professional braider (but must arrange to be done in the morning, not the night)
  • No ship-in fee
  • Horses can be left alone in any weather
  • Protection from the elements if it rains

Cons


  • Still need at least one bag of shavings per stall on top of the stall fee
  • Need to unpack some equipment and reload at the end of the day
  • Longer day than with shipping in because of the time to settle the horses and repack
  • Higher cost per day than multi-day stabling
  • Limited availability
  • More expensive than just shipping in and working off the trailer

Thursday, May 23, 2013

Tried, It's True! #1

This is the first post of a new series, "Tried, It's True!", in which I will recount events that I have really witnessed at horse shows that you should aim never to emulate! I hope that you will agree with me that these situations are not something that you should try yourself, but the stress of showing can lead our brains to shut down on occasion and these bad examples could help to set off alarm bells in your mind on those hectic days before anything gets to this point!
A very narrow aisle between tents

This past week I was at a horse show in which the tents were placed so close together that the aisle between them was literally four to five feet wide between the straps/anchors. I was walking down this aisle one day and I came across a horse being bathed in the cluttered space between the tents. When I got closer, I realized that the horse was tied to one of the D-rings on an end stall! I couldn't believe that the person bathing the horse was not aware of what a dangerous situation she had put this horse in.

There were a few others who I had seen attempting to shower horses between the two tents, but these horses were not tied and in many instances they were still getting legs on or under the straps or metal anchors. Many shows have designated showering areas; these areas are not only safer for the horses, but they also keep the ground from getting muddy where the horses and vehicles need to pass between the tents, and they avoid water spraying onto tack, hay, etc. This particular show did not have a designated showering area, but there were still hoses located in more open spaces and at the ends of the tents where there were fewer obstacles to contend with.

Many horses, especially at a busy horse show with cold water and no cross-ties, will move around during a bath. Even if your horse tends to stand still, plan the location of the bath as though your horse will move. Horses are unpredictable and you don't want the one time out of a hundred that your horse moves to happen when you're in a cluttered, confined area. It only takes a second for a serious laceration, knock, or more to occur.

I don't recommend tying a horse for bathing at a show unless there is a safe place to tie to, designed to be used as a location for tying. If your horse is used to being cross-tied for bathing, a stressful horse show is probably not the best place to attempt to tie with a single lead for the first time. Ideally, you'll have one person to hold the horse while the other wields the hose. You can also hold the horse and the hose at the same time, but you'll have to give yourself extra space because the horse will be able to circle around you.

Great for hanging buckets, not great for tying horses
Those little D-rings about halfway up the wall of a vinyl temporary stall are there for hanging buckets. They were not put there as a place to tie a horse. Temporary stalls are usually only fastened together by a couple of metal pins on each corner. This means that the wall can be lifted up easily without too much force, which would make it easy for a horse to lift it up when panicking, especially if the force is being exerted near the corner, where those D-rings are located. The last thing that you want for a panicking horse is something large and loose attached to it that will cause even more panic. Even when I'm putting up cross-ties in an aisle of temporary stalls, I like to wrap the baling twine (which the cross-tie is then attached to) around both vertical bars at the junction of two stalls so that if the horse manages to exert a lot of force on one cross-tie, it's not acting on a single stall front that can be lifted up and out of place to further panic the horse. If anything happens, it will lift both stall fronts as well as the pins so that the stalls don't lose their integrity. 

Sometimes you have no choice but to tie to part of a single stall wall, for instance if you need to tie a horse inside of its stall for braiding or to discourage rolling (although in that case the horse is contained and will feel less of a desire to pull back on the tie), but you just have to be as careful as you can be in your choice of location and in using something like baling twine to act as a breakable safety mechanism.
This is not a wash stall!

All of this put together makes the situation that I witnessed very dangerous. Not only was the horse tied directly to a weak part of a stall with nothing behind it to discourage it from pulling back, but it was in an area where stepping to either side could get a leg caught on part of the tent, and the act of showering the horse would make it much more likely to dance around or fight the restraint. The tents being so unusually close together in this situation made things even more dangerous, adding in more tent straps and anchors for the horse to get caught up in, as well as more traffic and objects in close proximity.

Luckily, in this case, I didn't see or hear about any big accidents, but the risk was so unnecessary and things could easily have gone either way.


Saturday, April 30, 2011

Pre-Ordering Hay and Shavings

If you cannot bring your own hay or shavings to a horse show that provides stabling, you can buy them there instead (beware, however, of the horse show mark-up!). In order to simplify life, you can pre-order them on your stall request form. There should be a section on the form that will allow you to specify a number of hay bales and/or bags of shavings to split amongst your stable. If they will not be used for every horse in the barn, changes to the bill split can be made in the office (do this earlier in the week, not on the last day of the show).

There are several reasons for you to pre-order them instead of ordering when you arrive at the show:
  1. It's one less thing to stress about as you move in
  2. They will be there waiting for you (either all in one of your stalls or outside of your stabling area) when you arrive so that you can bed the stalls and feed the horses immediately
  3. It allows you to do the math of how many to order at home when you still have the ability to think straight
  4. It avoids the problem of either running around trying to find the delivery person who is not aware that your newly-made order is urgent, or discovering that it is too late in the day when you arrive and the delivery person has gone home

If you pre-order, it is safe to assume that any piles of hay or shavings that you find in your stalls upon your arrival belong to you. If you do not find any hay or shavings in your stalls but you have pre-ordered, check the area outside of your stalls. If they are left outside, the delivery person will usually leave a receipt tucked in the pile in order to identify the owner, so make sure that any receipt that you find matches your name before taking possession of anything.

If you have pre-ordered but do not find any hay or shavings near your stalls, keep an eye out for the delivery tractor as you unload your horses. If it is still early in the day and you see that the tractor appears to be busy, it is safe to assume that they are busy with deliveries and simply haven't gotten to yours yet. If you see that the tractor is quiet and others seem to have received their orders, it's time to go to the office to inquire about your order. Sometimes orders do get lost, either missed on your stall form or overlooked by the delivery person. If there are lots of orders still being delivered, it probably isn't worth bothering anyone about yours just yet.

If you have room in your trailer, bringing your own hay and shavings can be worth it because those at the show tend to cost at least twice as much as they would cost elsewhere.


Wednesday, May 12, 2010

Tack Boxes

Tack boxes are very handy for getting your equipment to and from each show while keeping it all neat and organized. They come in all shapes and sizes and which type you use will depend on your budget, available space and preferences for weight and style.

Most tack trunks fall under one of the following categories:

Vinyl Trunks - These are usually the most stylish option, often made with custom colours and the rider's name or initials printed on the trunk. They are available in a variety of sizes and the largest ones can generally fit anything that you'd like to put in there. The downsides to this option are their space requirements and their weight. The larger models can be very wide and therefore don't fit in the more narrow tent aisles. In such a case, you would be forced to put the trunk outside or in a tack stall (it will take up a lot of space in there!). They can be difficult to carry around even for two people, so they are not a good option if you'll be doing most of the loading or unloading yourself. They are also very expensive.

Wooden Trunks - These also look very classy when they are done well. Again, they can come in a variety of sizes but I have found there to be a lot more narrower widths available than in the vinyl category, which makes fitting them in tent aisles much easier. They can be quite heavy, so again, usually two people are required to move them around. The cost varies depending on the size and quality. If you can build one yourself, it can be a very inexpensive option.

Plastic Trunks - These provide a lighter alternative to the vinyl or wooden trunks while still providing some bigger sizes to fit all of your equipment. They tend not to look all that nice and a lot of riders will use a special trunk cover to improve the look. They are generally a bit cheaper than wooden trunks. The Stanley brand is very popular.

Rubbermaids - This is my tack box of choice! They are inexpensive, very light and come in a variety of sizes. They tend not to look all that attractive, but they are practical. One strong person can often lift even the larger ones without help, so they are great if you will be working solo. I also like being able to empty some of them into the tack stall and then just tossing them back into the trailer for storage. Not necessarily the best choice if you're worried about looks. 

Whichever type you choose, make sure that the box will fit through the tack room door of any trailer that you will be using. Some of the wider trunks will not fit through your average trailer tack room door and therefore need to be transported specially!


Friday, April 23, 2010

The Muck Heap

If you're stabling at a horse show, you will need to find out where the muck heaps are located. It doesn't seem like a big deal, but dumping your wheelbarrow in the wrong spot can block pathways, bother other barns or even prevent the manure from being removed if it's in an area that tractors can't access.

Step number one for finding a muck heap is to look for signs. Some shows will hammer signposts into the ground where they want you to dump and you're safe as long as you use a signed area.

Muck heaps are sometimes contained within walled wooden or concrete structures or metal containers, which makes them easy to find. Often, however, the muck heaps will just be on an inconspicuous open spot of ground.

Unfortunately, many shows don't bother with signage. In such a case, it's best to watch where other grooms in your stabling area go. Keep in mind that some people will disregard the official muck heaps and make their own for convenience' sake, so make sure that the location seems reasonable before dumping your own wheelbarrow there.

Here's a short checklist to run through to make sure that you're in the right place:
  • Is it in the middle of a road or aisle? If so, chances are it's just someone's lazy dumping spot rather than the official location. Dumping there will make it difficult for people to get by and to clean up, and could result in a fine.
  • Is there tractor access? If the only access is very narrow, chances are the tractor won't be able to get in there to clean it up.
  • How close is it to other barns? This one is tough because sometimes the official muck heaps will spread out to within a few feet of nearby stalls if they aren't compacted often enough (which is one very good reason to dump your wheelbarrow as deep into the pile as you can get). If the muck heap is on someone's doorstep, you probably shouldn't add to that one, anyway!
If you're still not sure whether you're dumping in the right place, keep your ears open for announcements made to the stabling area because the show office will usually try to correct any bad muck heap situations that way.


Wednesday, April 21, 2010

Hay and Shavings: How Much Do You Need?

If you've never stabled away from home before, you might be wondering how many bags or bales of shavings and hay to pack or order.

As far as shavings go, you will have to have enough to bed the stall down initially and then more to replace the dirty bedding. How many bags you will require will depend on the base of the stall and how deeply you like to bed. On grass or dirt, you can use fewer bags because the ground will soften as the horse moves around in the stall. On cement or asphalt, you will need to bed more deeply in order to create a base and prevent scrapes.

My general rule of thumb for packing or ordering shavings is about four bags per stall to begin with. I will usually put three bags in each stall and then make a decision a few hours later about whether to add another (depending on the base of the stall and the size/fluffiness of those bags of shavings). I usually estimate that I'll need to add in another third to half of a bag to each stall each day after mucking out.

As far as hay goes, it will depend on the size and quality of the bales, as well as how easy or difficult your horse is to keep. I find that estimating about 3/4 of a bale per horse per day works quite well, but it's best if you keep track of how much you use at home and then bring a bit more than that, just in case. One of the most convenient aspects of ordering from the show is that you can underestimate the amount and then just order more later!


Monday, April 12, 2010

Hay and Shavings

If you're staying overnight at a horse show, you might want to order hay and shavings from the show office rather than packing them in your horse trailer, taking up room that you might not have to spare. Ordering from the show is also convenient because you can order small amounts every couple of days rather than having to find somewhere to store one or two weeks' worth of hay and shavings.

Keep in mind that there will be a significant mark-up on the products sold at the horse show. Expect for hay and shavings to cost at least $6 to $8 per bale/bag.  

When you order from the horse show, your hay and/or shavings will be delivered right to your stalls. If you want to have them waiting for you when you arrive at the horse show, make sure that you order them ahead of time on the stall request form (there should be a section for it or an additional form).

Once you're at the show, you can order additional hay or shavings at the show office. Find the hay and shavings order pad (different shows use different forms so it's best to ask the secretary for it) and fill it out with however many bales of hay or bags of shavings you would like, the date and your barn's name (make sure that it is the same name that is on the stabling map). If your tent or barn has an identifying number or letter, include that on the order form to make things easier for the delivery person. Also write down the stall number where you would like the bags left. If the order is for a specific few horses rather than the entire barn, mark those horses' names on the form so that only they will be charged for them.

Once you have filled out the form, ask the secretary what you should do with it. Usually, there will be two copies. One will go to the secretary so that the order can be put on your bill. The other copy is for the delivery person to reference. At some shows, the secretary will take care of both copies while at others you will need to attach the second copy to something like a clipboard. Ask the secretary what the show's policy is so that your order doesn't go missing!

If you order late in day, you might not receive your hay and shavings until the next day, so try to keep on top of things in order not to run out before the delivery. The show office will often have a policy posted about delivery hours.


Saturday, March 27, 2010

Tent Stalls: Rolling Up The Flaps

If you are stabled in a tent, chances are you that will need to roll up the flaps at least once during the show. Even if it doesn't rain or get cold, the tents will often be put up with the flaps hanging down and are left that way until you arrive.

In order to put the flaps up, you will need something to stand on. Mounting blocks work very well but a shavings bag or hay bale works if that's all you have.

Stand inside the tent and look up at the edge. You should see something like this (I'm not showing the flap here), with a rope running along the inside edge of the tent between the end of the roof and the decorative border:


Adding in the flap, you will see that it is attached to the rope by a series of plastic clips. Depending on the age of the flap, there might be lots of clips or there might be many that are broken or missing. The fewer clips you have, the more difficult it will be to neatly roll the flaps up.


Now, to roll up the flap, stand on the mounting block inside the tent, almost right under the rope. Un-clip the clip that is closest to you (it is easier to clip onto the rope than it is to unclip. To unclip, you will need to push on the little finger and jiggle it away from the rope. To clip it back on, all you need to do is push the finger side against the rope).


Next, start to roll the flap up towards you, starting from the bottom and keeping that clip at the top accessible and centered. This might be difficult if the flap is new and thick or if you have a lot of clips fastened to the rope along the top.  If you're having trouble, un-clip the neighbouring clips, too. Your flaps won't be rolled as tightly, but it will still work.


Once you have it rolled all the way to the top, flip the roll around 360 degrees and clip it back onto the rope. This will keep it rolled up!


Now move one or two fastened clips down the flap and repeat.  This method works because you are alternating twisting one way (the original) and then the other (what we're doing here), so make sure that you always leave a clip or two between your rolls (otherwise when you flip the next one, it will just rotate a section of the flap and lose the tight fold).

To bring the flaps back down, just go along the flap and un-clip those twisted sections. They will unroll themselves and you can then clip back on to the rope or just leave those clips hanging if it doesn't sag too much.


Thursday, March 25, 2010

Tent Stalls: Flaps in the Rain

Tents stalls require a lot of work when the weather changes. Today I will go through what to do when it starts to rain, assuming that you are starting with the flaps hanging straight down. In another post, I explain how to roll and unroll the flaps.

First, let's set out some terms to use. I have labelled the photo on the right, showing tent stabling with the flaps rolled up in order to show all of the supports, with two terms.  

When I say 'vertical support', I am referring to the upright wooden or metal support at the edge of the tent that supports it from below.  

When I say 'angled support', I am referring to the rope or woven strap that holds the tent taut.


When the flaps are hanging straight down, like in the drawing at left, they should hang between the vertical supports and the angled supports. If they are hung to the inside (towards the stalls) of the vertical supports, you will not be able to pull them out away from the stalls when it rains to keep the water away. 


This drawing at right shows what you should do to the flaps when it's raining. If the flaps are not brand new, there should be small holes located along the bottom edge of the flap (the flaps don't come with them, so they have to be cut into new flaps unless there are loops of webbing in just the right place). Locate the hole closest to each angled strap and pass a piece of baling twine through that hole. Pull the flap out towards the angled support and use the baling twine to tie the flap to the support (if there is a loop near the bottom of the support strap, passing the baling twine through that loop will make it more secure by keeping it from slipping up the strap). Repeat for each angled support along the length of the flap.

Tying the flaps out allows the rainwater to run away from the stalls and it also keeps the flaps from flapping noisily against the stalls in the wind.

Complete your rainproofing by digging trenches under the flaps to keep heavy rain from flooding back into your stalls.


Sunday, March 21, 2010

Stabling Etiquette

Due to the compact nature of horse show stabling facilities, you will be spending a lot of time in close contact with your neighbours. For that reason, it's a good idea to be aware of good stabling etiquette before you get to the show so that you will still be on speaking terms by the end of it!

Unloading your trailer

Try not to block any roads (pull as far over as possible so that others can still get by). Do you best to unload quickly, without taking breaks, and move the trailer to the parking area as soon as you're done so that the next person can pull in. You don't need to set everything up as soon as it comes off the trailer; the most important thing is to get that trailer in and out of there quickly once the horses are settled in!

Setting up

Keep the aisles as clear as possible. Make sure that there's enough room left in a wide aisle for two horses (so that others can pass while you use the cross-ties) or enough for a horse to pass comfortably in a narrow aisle. The more you can keep off the ground, the better.

Keep everything in your own area. You can use the space in front of your own stall fronts, but don't overflow onto others' unless you are invited to. If you have any end stalls, you are entitled to use the space at the ends for storage, too. That end space is incredibly useful, so if you don't plan on using it, it's nice to offer it to your neighbours.

Cross-ties should be located so that any horse using them will be standing within your own area. If you are in a narrow aisle, it's best not to use cross-ties since any horse using them would block the aisle off completely.

Think hard about which horses will use which stalls. If you have an antisocial horse, try putting that one next to your tack stall or in an end stall so that he won't aggravate anyone else. If you are bringing a stallion, inform your neighbours about him and ask for their input on his housing arrangements, too (remember that any neighbours behind will be affected, too). If you have a horse that likes to chew on things, avoid putting him next to anyone's tack stall since some horses are capable of pulling things over the top of those short stall walls.

During the show

Make sure that other horses can pass through the aisle at all times (that means no leaving horses unattended in the aisle). Keep stall doors closed and make sure that any unfriendly horses are kept behind bars!

If you are allowed to bathe horses in the stabling area, make sure that you don't spray anyone else's stalls or equipment. This seems obvious, but when a horse is moving around a lot it can happen accidentally. Also try to keep the water shut off as much as possible or move your bathing area around so that you don't create a big mud puddle. If there are wash stalls available, don't keep your horse in one for longer than it takes you to bathe him so that another horse can use it without too long of a wait.

Leave everything how you found it. If you borrow a hose to water your horses, leave it neatly how you found it (it's usually safe to coil it as tightly as the owners do). The same applies for borrowing mounting blocks. After you've asked to borrow one, either use it where it already is or, if you must move it, ask someone on the ground to return it for you.

Keep the aisle clean. Any poop should be removed from the aisle or wash stall immediately and the aisle should be raked several times per day to keep it smooth and clean. 

Going home

The busiest time for trailers is the afternoon of the last day of the show because everyone wants to leave at the same time after the classes finish. Prepare by packing all of your things up in the morning so that everything can be loaded at once, without delays. Again, try to load quickly and then get out of there to make room for others.

If you are not comfortable navigating your trailer in tight spaces, don't attempt to pull up close to the barn during the busiest times because you might end up blocking others when you can't get back out! If you can't pull in nearby, try loading your things onto the back of a truck and then taking a few loads out to your trailer that way. If you have time, it can be much easier to just wait until your neighbours have left and then you can load at your own pace.


Tuesday, March 9, 2010

What to Pack: Stabling at the Show

Tent stalls
Stabling areas vary from show to show, which means that there the equipment you will need to bring will vary as well. If you know what type of stabling your horses will be staying in (you can usually request a certain area on the stabling form but that is not a guarantee), you might be able to leave certain things at home.

The most common types of show stabling are permanent stalls (usually wooden stalls in a permanent building), semi-permanent stalls (portable stalls in a permanent building) and tent stalls (portable stalls under a tent). Portable stalls can be made of wooden slats, puckboard (increasingly common) or vinyl/styrofoam. The advantage of portable stalls is that they can be reconfigured based on your needs, either to remove a partition to create a bigger stall or to open up a display stall. Permanent stabling is generally stronger, drier and more user-friendly.


Semi-permanent stabling
Here's my packing list for stabling at the show:

Must-haves:
  • Buckets and snaps: Bring at least two buckets per horse. You can use one as a water bucket and one as a feed bin or, on hot days, fill both with water so that you don't have to worry about dragging the hose out between classes.
  • Hose: Usually there are more groups of horses stabled together than there are hose connections, but it's a good idea to bring your own hose anyway in case someone else forgets to bring one, you're stabled away from others, you need to connect two hoses together to reach your last stall, or there's a separate bathing area without hoses supplied.
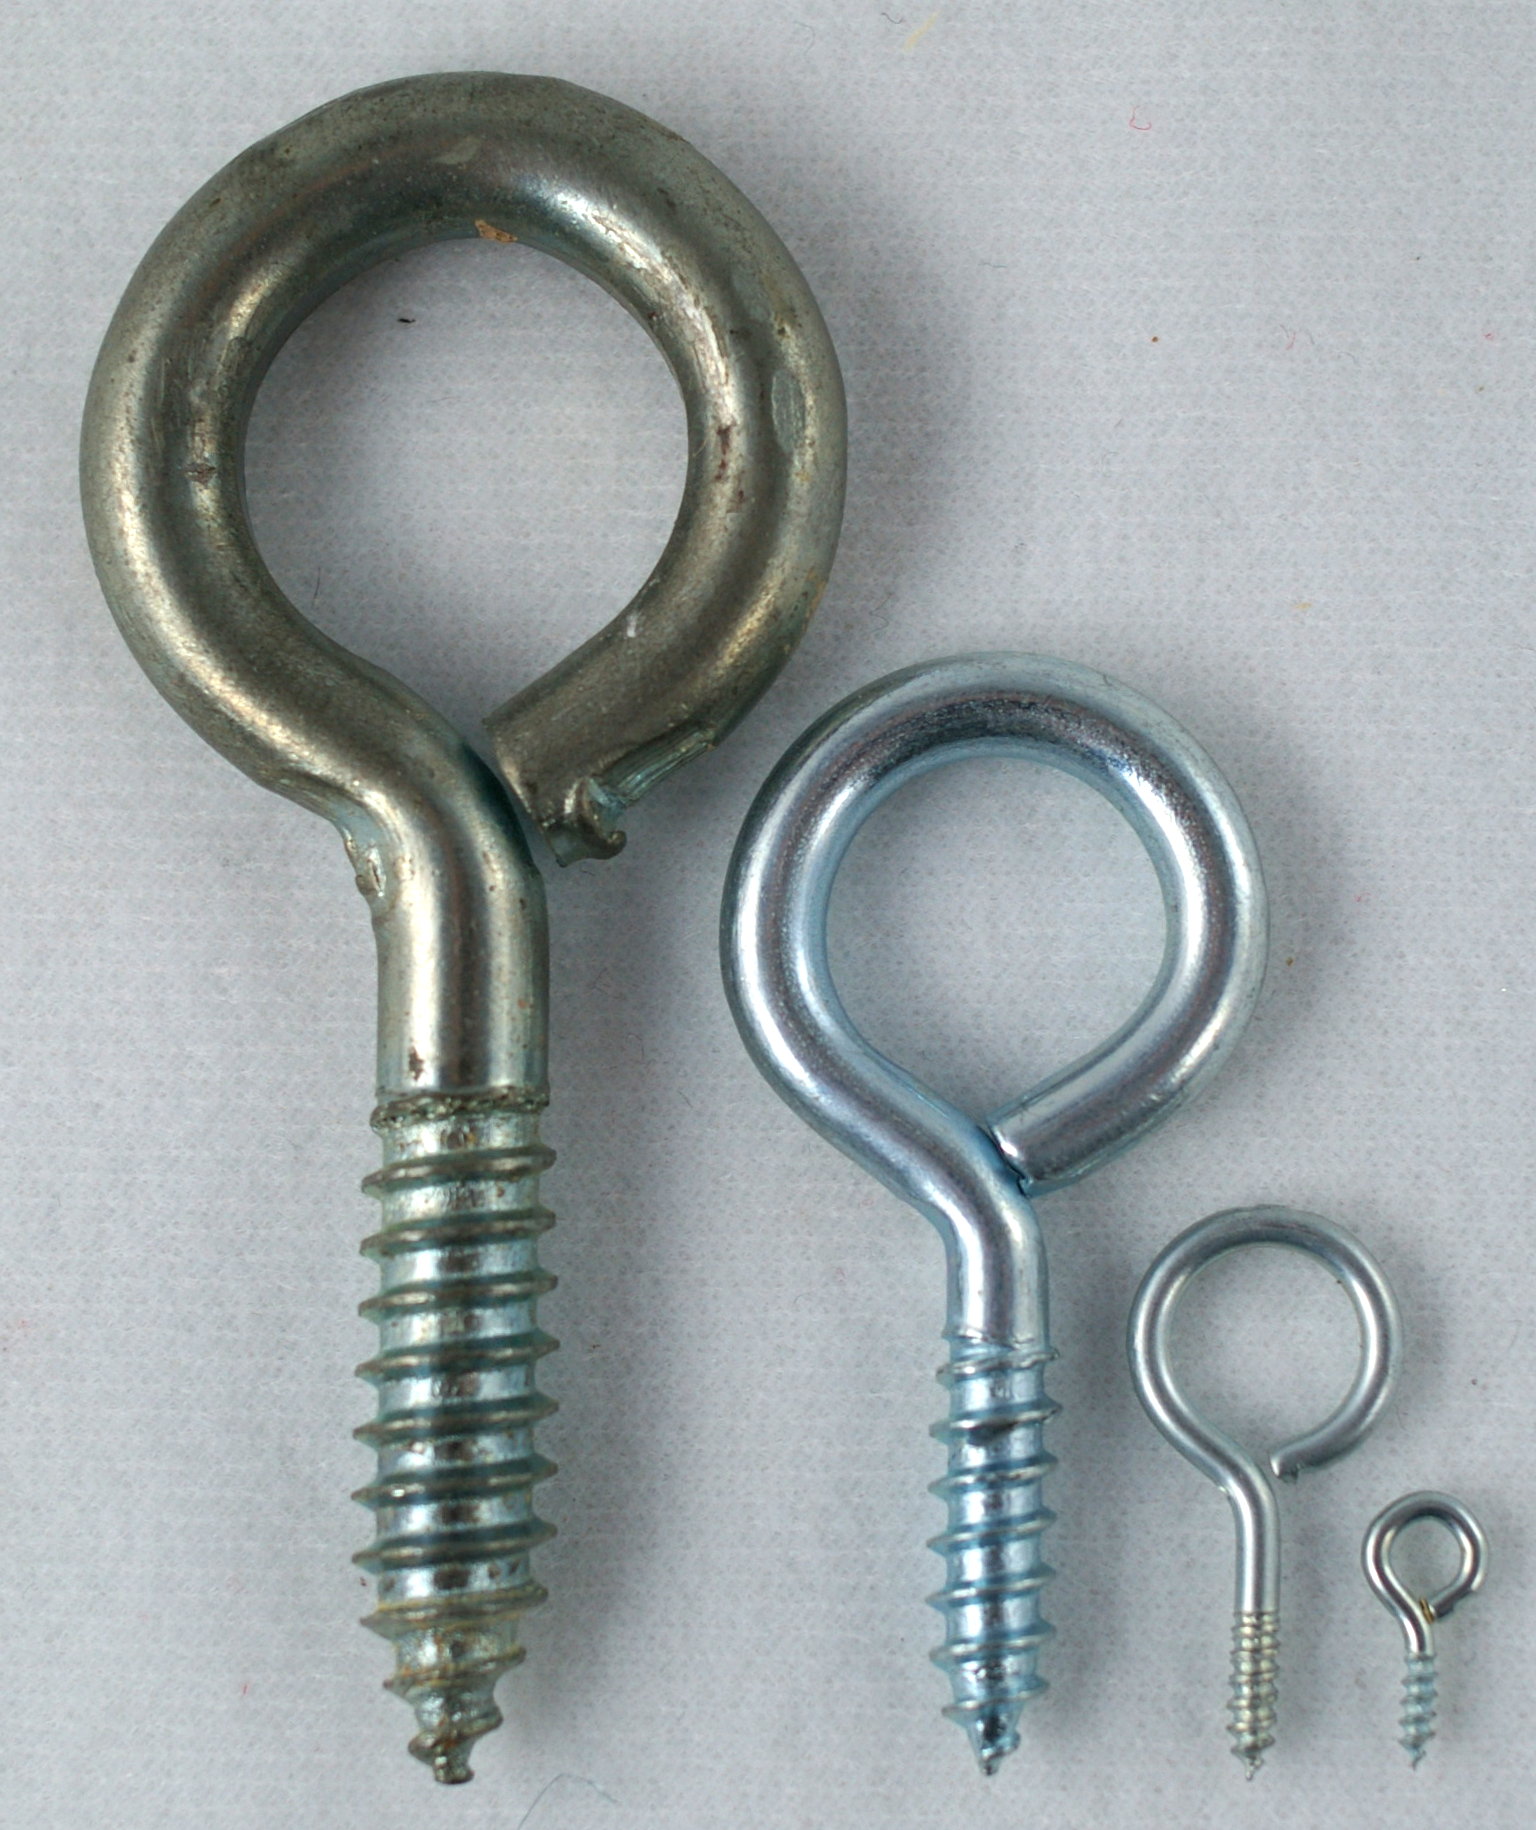
  • Screw eyes: Use these to attach your buckets to the wall in wooden stalls. If you're stabled in portable stalls, there will be rings hanging from the walls or you can loop baling twine around a bar and snap on to that.
  • Baling twine: Yes, you can take it off of the hay that you bring, but you have the greatest need for baling twine on the arrival day before you have opened any hay. Use it to hang things, tie doors back, create blanket racks, tie tent flaps up, etc.
  • Saddle and bridle racks: Pretty self-explanatory!
  • Duct tape: Use it to fix hoses, create name plates, tape electrical cords safely, etc.
  • Mounting block: It's best to bring your own so that you don't have to ask to borrow someone else's every time you mount up, and you can bring it to the ring with you.
  • Wheelbarrow: You will need something to transport manure to the manure pile, and wheels are a must since it can be quite far away.
  • Pitchfork: Self-explanatory.
  • Rake or broom: Clean up your aisle, both to look good and so that no one else will need to walk through your mess.
  • Shovel: If it rains and you're in temporary stabling, chances are you'll be digging trenches.
  • Flashlight: The overhead lights often don't work in tent stabling, so a flashlight is needed for night checks.

Bring if you can:
  • Hammer and nails: Very useful for setting up a tack room in wooden stalls (remove the nails before you leave).
  • Tarp: You can often leave your hay under the overhang between the last stall and the end of the tent or building, but if the overhang is almost non-existent, use a tarp to protect your hay from the rain. You can also bring it to the warm-up ring to use as a liverpool.
  • Hose end or pistol: When you're watering horses in a packed aisle, the last thing you want is to get water over everyone's tack boxes and horses. Bringing a hose end will let you shut the water off between horses without going back to the tap (which could be very far away). They're also great to use while bathing your horse to prevent the area from getting too muddy. 
  • Cross-ties: Use either real cross-ties or extra lead ropes to give yourself a clean area in which to groom horses.
  • Stall guards: Sometimes the stall doors can be a pain to open and close. Having a stall guard will allow you to keep the door open when you make trips to and from the tack stall. You can also use stall guards as blanket racks.
  • Shelving: Portable shelving is very useful in tack stalls and grooming areas as it allows you to stack vertically instead of having everything on the ground.
  • Hay and shavings: You can buy them from the horse show, but they will be expensive so it's best to bring them from home if you have room in your trailer.
  • Chairs: Creating a seating area will give you somewhere to rest your feet without getting yourself dirty by sitting on a mounting block or a hay bale.
  • Tack cleaning hook: It will be much easier to clean your tack from a proper hook instead of trying to hang it somewhere else where you can't see well or where it risks falling on the ground.
  • Extension cord: Use it for fans, clippers, etc.
  • Box fan and bungees: Stalls can get hot in the summer so some horses like to have a box fan bungee-corded to the stall front. Make sure to tape the cords well out of the way of teeth. 
  • Lots of extra snaps and hooks: You never have enough places to hang things in the tack room and snaps get broken or lost.  Extra snaps can also be used to add extra security to the metal latches on permanent stalls.